Introducing Solar Pergolas for Urban Outdoor Spaces
Urban living often means dealing with limited outdoor areas. Small patios and decks demand solutions that maximize utility without overwhelming the space. A solar pergola addresses these challenges by providing essential shade while harnessing sunlight to produce clean electricity for everyday needs.
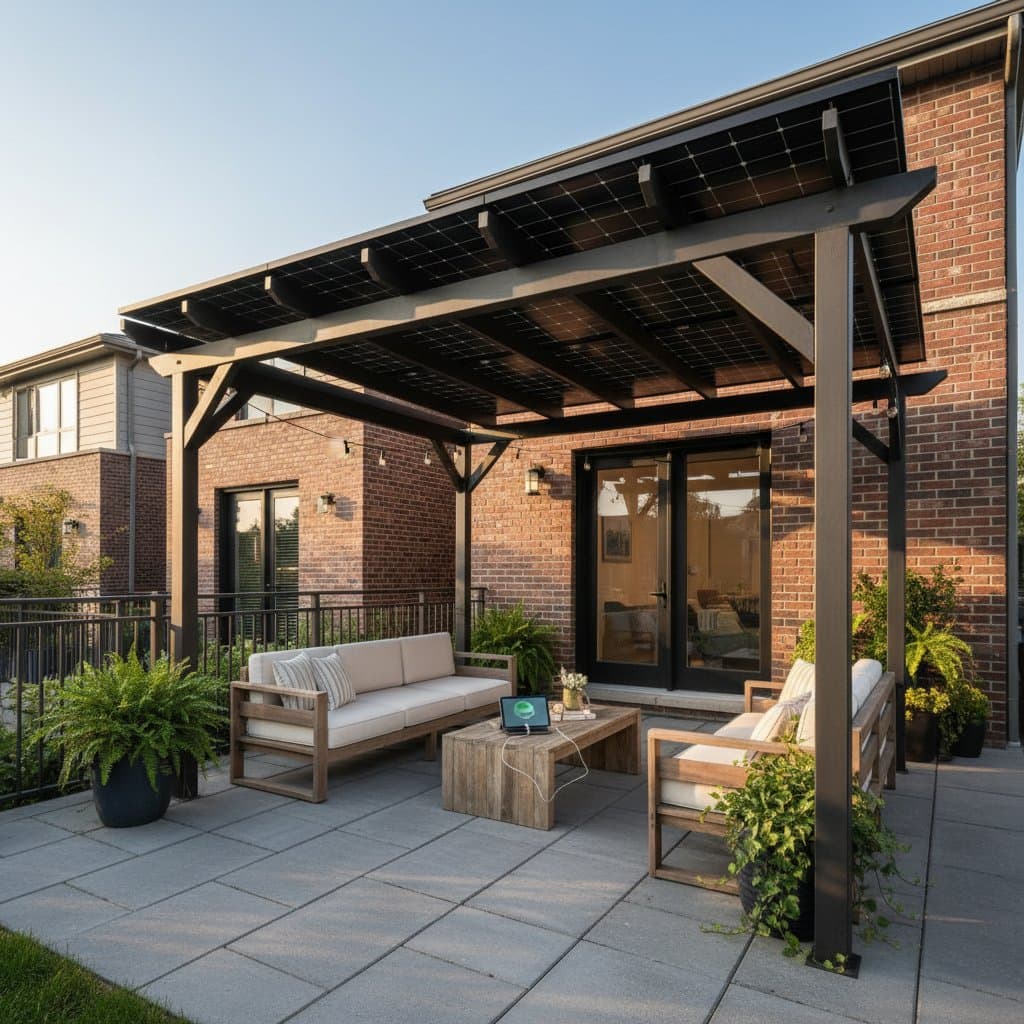
This structure combines architectural elegance with renewable energy production. It fits seamlessly into tight spots, covering no more ground than a standard dining set. Homeowners gain a comfortable retreat that powers string lights, ceiling fans, or charging stations, all while reducing reliance on grid electricity.
The design process focuses on simplicity and efficiency. Select a frame that supports solar panels without compromising stability. Consider local sunlight patterns to optimize energy output, ensuring the pergola serves both aesthetic and practical purposes year-round.
Essential Tools and Materials for Construction
Assembling a solar pergola requires careful selection of durable components suited to outdoor conditions. Begin with sturdy posts made from pressure-treated lumber or aluminum alloy, each measuring 4 inches by 4 inches and standing 8 to 10 feet tall for adequate coverage. These materials resist weathering and support the weight of panels effectively.
For the framework, procure crossbeams and rafters in lengths matching your patio dimensions, typically spanning 6 to 10 feet. Opt for polycrystalline or monocrystalline solar panels, installing two to four units rated at 100 to 300 watts apiece to suit small-scale needs. Secure them with heavy-duty aluminum mounting brackets designed for rooftop or ground-mount applications.
Electrical components include a pure sine wave inverter to convert DC to AC power and an MPPT charge controller to regulate voltage and prevent overcharging. Use UV-resistant, outdoor-rated wiring encased in PVC conduit for protection. Additional essentials encompass a bag of quick-setting concrete for footings, a post-hole digger, a cordless drill with bits for wood and metal, a level, and personal protective equipment such as gloves, goggles, and a hard hat.
Professional input proves invaluable for electrical integration. Consult local building codes to ensure compliance, particularly regarding grounding and circuit protection. If electrical expertise lacks, engage a certified electrician to handle connections and inspections.
Detailed Installation Process
Site Preparation and Measurement
Start by evaluating your patio layout. Measure the available area precisely, aiming for a footprint of 8 feet by 8 feet to accommodate a small gathering space. Maintain at least 3 feet of clearance around the perimeter for safe movement and access to adjacent areas.
Sketch a simple diagram noting post positions and beam alignments. Factor in overhead obstacles like tree branches or building eaves that might block sunlight. This planning stage ensures the structure captures maximum solar exposure, ideally facing south in the Northern Hemisphere.
Foundation and Framework Assembly
Mark post locations with stakes and string lines for accuracy. Dig holes 12 inches in diameter and 24 to 36 inches deep, depending on soil type and frost line requirements in your region. Pour concrete into each hole, inserting posts and bracing them temporarily to achieve plumb alignment using a level.
Allow the concrete to cure for 24 to 48 hours. Then, attach horizontal crossbeams to the tops of the posts with lag bolts or galvanized brackets. Install rafters perpendicular to the beams, spacing them 12 to 16 inches apart to distribute panel weight evenly and provide dappled shade.
Solar Panel Integration
Position mounting brackets on the rafters at intervals matching your panel array. Secure panels to the brackets with stainless steel hardware, angling them 15 to 30 degrees toward the sun's path for optimal tilt. In urban settings with partial shade, adjustable mounts allow seasonal repositioning to boost efficiency.
Route wiring from panels along the underside of rafters, threading it through conduit clips to shield against rain and debris. Connect positive and negative leads in series or parallel configuration as per your system's design, adhering strictly to polarity indicators.
Electrical Setup and Final Connections
Mount the inverter and charge controller in a weatherproof enclosure near the structure's base, ideally under a protective overhang. Link the solar array to the controller, then to a deep-cycle battery bank for energy storage. Finally, wire the inverter output to low-voltage outlets or integrate with your home's system via a transfer switch.
Perform a thorough test using a digital multimeter to verify open-circuit voltage and current flow. Power up a test load, such as an LED light strip, to confirm stable operation. Document all connections for future reference and schedule a professional inspection if required by local regulations.
Prioritizing Safety During Installation
Safety forms the cornerstone of any outdoor project. Equip yourself with non-slip gloves and impact-resistant eyewear to guard against splinters, dust, and flying debris. Select a stable ladder with a wide base, positioning it on level, dry surfaces away from edges.
Handle electrical components only when power sources are disconnected. Install ground fault circuit interrupters on all outlets to prevent shocks. Secure loose materials to avoid trips, and work with a partner for lifting heavy panels or beams.
Weather awareness matters greatly. Avoid installation during high winds, rain, or extreme heat. If thunderstorms approach, halt activities immediately and cover exposed wiring. Post-installation, label all circuits and restrict access to authorized individuals only.
Cost Breakdown and Timeline
Material costs range from $900 to $1,800, varying by panel quality and frame material. Posts and beams account for about 30 percent of the budget, solar panels 40 percent, and electrical gear the remainder. Sourcing from local suppliers or online wholesalers can yield savings, especially on bulk wiring or recycled components.
Labor time spans two to three weekends for a novice builder. Dedicate the first day to site prep and foundation work, the second to framing and mounting, and the third to wiring and testing. Experienced DIYers complete the task in one intensive weekend, while hiring help for electrical work adds a half-day.
Long-term savings offset initial investment through reduced utility bills. A modest setup generates 200 to 600 kilowatt-hours annually, enough to offset lighting and small appliance use. Factor in potential rebates from utility programs or tax incentives for solar installations.
Ongoing Maintenance Practices
Preserve performance with routine care. Clean panels quarterly using a soft-bristle brush and lukewarm water mixed with a pH-neutral soap, avoiding abrasive cleaners that scratch surfaces. Inspect for bird droppings or pollen buildup, which reduce efficiency by up to 20 percent if left unattended.
Examine the frame biannually for loose bolts or signs of corrosion. Tighten fasteners with a torque wrench and apply rust-inhibiting spray to metal parts. Prune overhanging foliage to maintain unobstructed sunlight access, targeting a clear radius of 10 feet above the panels.
Monitor electrical systems monthly via the inverter display or app, if equipped. Replace any frayed wires or degraded batteries promptly to avoid system failures. In winter, cover panels lightly during heavy snow to prevent structural strain, uncovering them as weather improves.
Integrating Practical Storage Solutions
Enhance usability by incorporating built-in storage. Install galvanized hooks or shelves beneath beams for lightweight items like garden tools or lanterns. A weather-resistant cabinet bolted to a post can house batteries and controllers, keeping them elevated and dry.
Opt for modular benches with lockable compartments to store extension cords and maintenance supplies. Ensure all additions remain lightweight to avoid overloading the frame. Secure elements with straps or anchors to withstand gusts up to 50 miles per hour.
These features promote organization without cluttering the space. They encourage frequent use of the pergola, turning it into a multifunctional hub for relaxation and utility.
Expanding and Optimizing Your Setup
Launch with a basic configuration of one or two panels to power essentials like pathway lights or a USB charging port. Observe output over the first season, tracking via a simple energy meter. This data informs decisions on adding panels or upgrading to higher-capacity batteries.
Consider smart integrations, such as automated shading fabrics that deploy via app control. These additions enhance comfort without complicating the core structure. Regular use reinforces the pergola's value, fostering a sustainable outdoor lifestyle tailored to urban constraints.
Ultimately, this project empowers homeowners to reclaim limited space innovatively. The result is a resilient, self-sufficient patio that delivers shade, power, and style for years to come.