Weatherproof Pergola Pods: Outdoor Rooms for 2025
Patios often remain idle during inclement weather, limiting their potential as living spaces. A weatherproof pergola pod addresses this challenge by converting open patios into adaptable, enclosed areas that provide shelter on demand. These structures deliver controlled light, shade, and protection, ensuring your outdoor space remains functional across all seasons.
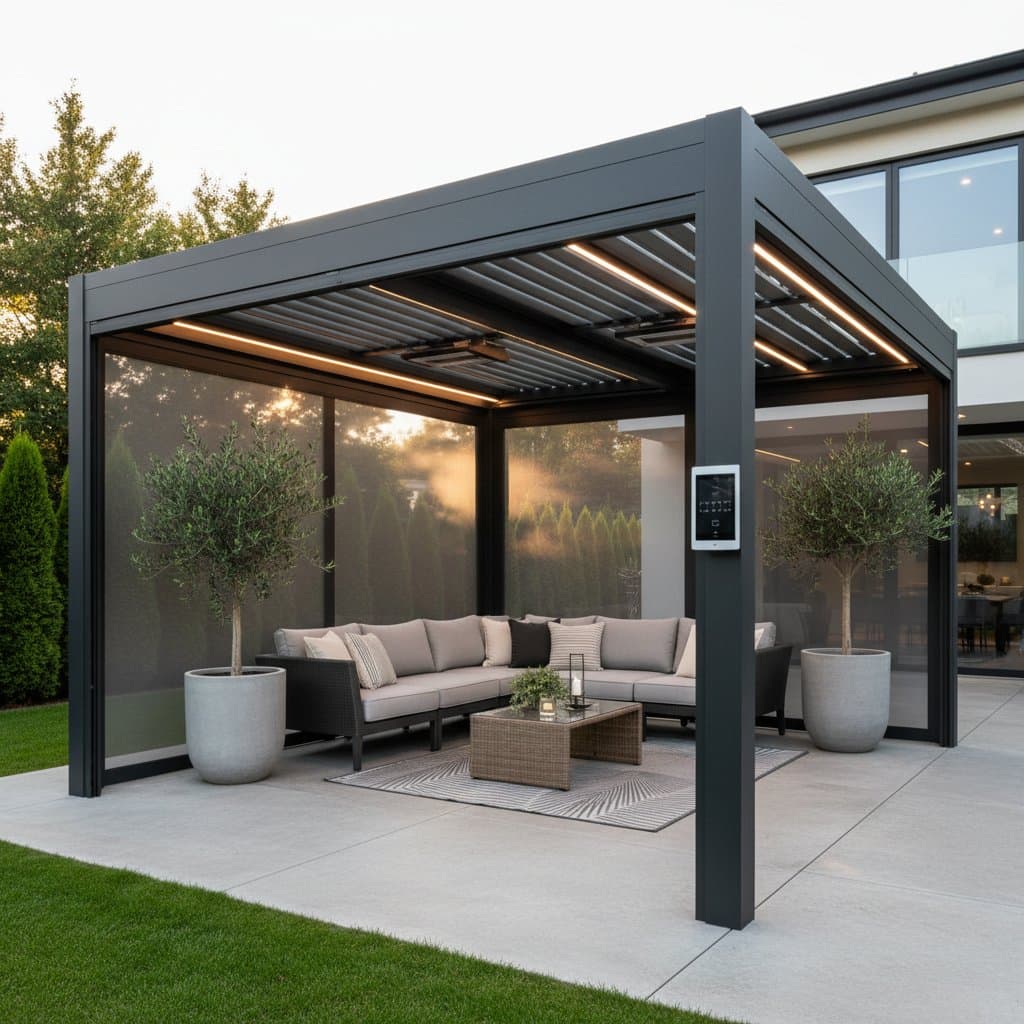
A pergola pod consists of a sturdy aluminum or steel frame supporting a retractable roof, along with options for sliding screens or tempered glass panels. This design mimics the comfort of an indoor room while preserving the openness of the outdoors. Users can adjust the enclosure for sunny breezes or secure it against rain and wind, making it suitable for compact urban terraces or expansive suburban yards. In 2025, advancements include motorized controls via smartphone apps and energy-efficient materials that enhance durability and sustainability.
Essential Tools and Materials
For those undertaking a DIY installation or assisting with assembly, prepare the following items to streamline the process:
- Measuring tape, extending at least 25 feet (7.6 meters), to confirm precise dimensions and fit.
- Level and framing square to ensure the structure aligns perfectly with the ground and walls.
- Cordless drill equipped with bits for weather-resistant screws and anchors.
- Silicone-based sealant for creating watertight joints and edges.
- Sturdy ladder reaching at least 8 feet (2.4 meters) to access roof components safely.
- Protective gloves and safety goggles to guard against sharp edges during cutting or fastening.
Prefabricated kits typically include pre-cut elements, with posts, beams, and roof sections clearly labeled. Verify all parts upon delivery and organize them by assembly sequence to avoid delays.
Installation Steps
Follow these detailed steps to erect a weatherproof pergola pod efficiently and securely.
- Measure and mark the installation site. Position markers to allow a minimum of 6 inches (15 centimeters) of clearance at the rear and overhead, accommodating drainage channels and operational movement.
- Secure the foundation. Install concrete footings or heavy-duty deck bolts designed to support outdoor loads. Proper anchoring prevents shifting during high winds or storms.
- Construct the frame. Join vertical posts to horizontal beams according to the manufacturer's diagram. Use a level at each joint to maintain plumb and square alignment before fully tightening connections.
- Mount the roof mechanism. Hoist retractable panels or adjustable louvers into place with assistance from a second person. Align edges carefully within guide tracks to prevent binding or misalignment.
- Apply sealants to joints. Apply a bead of silicone sealant along all seams and connections to block moisture ingress. Remove excess material promptly to achieve a clean finish as it sets.
- Fit side panels and enclosures. Secure retractable screens or sliding glass doors to the frame, testing their smooth operation for versatile enclosure options.
- Integrate electrical and accessory features. Install overhead lighting, radiant heaters, or ventilation fans, assuming pre-existing wiring. Disconnect power sources prior to any electrical modifications and consult professionals for complex setups.
Key Safety Considerations
Prioritize safety throughout the installation to minimize risks and ensure long-term reliability.
- Conduct work exclusively on dry, stable surfaces to reduce the chance of slips or falls.
- Don gloves whenever manipulating metal components to protect against cuts from sharp edges.
- Scan the area for overhead power lines or obstacles before elevating any panels or beams.
- Activate and test motorized components only after completing the full assembly, preventing damage from uneven loads.
Common Troubleshooting Solutions
Address operational issues promptly to maintain the pod's performance. If the retractable roof hesitates or halts during operation, inspect the tracks for accumulated debris such as leaves or dirt. Remove obstructions and flush the area with a gentle stream of water to restore smooth function.
For leaks observed during rainfall, examine sealant applications around joints and verify that gutter drain holes remain unobstructed. Reapply silicone to compromised areas and secure any loosened fasteners. In motorized systems, intermittent power issues often stem from tripped breakers due to surges; reset the circuit and perform a test cycle. If controls fail repeatedly, inspect the fuse within the control unit and engage a certified electrician for replacements or repairs.
Cost Estimates and Timeline
A standard pergola pod measuring approximately 10 by 12 feet typically ranges from $6,000 to $10,000 when professionally installed, including materials and labor. Opting for a DIY kit reduces expenses by about 25 percent, though it demands at least two individuals for safe handling of components. Expect the basic assembly to span two to three days for those with moderate handyman experience.
Enhancements like integrated LED lighting or infrared heating increase the upfront investment but extend usability into cooler months. Allocate additional funds for high-quality stainless-steel hardware and weatherproof electrical fittings, as inferior alternatives corrode rapidly and compromise structural integrity.
Ongoing Maintenance Practices
Preserve the longevity and appearance of your pergola pod through routine care. Wash roof panels quarterly using a solution of mild soap and water applied with a soft-bristled brush. Fully extend louvers during cleaning to access both interior and exterior surfaces thoroughly.
Apply silicone-based lubricant to hinges, tracks, and moving parts annually to ensure effortless operation. Routinely check seals, screens, and fabric elements for signs of wear or damage, repairing or replacing as necessary. After severe weather events, inspect and tighten all bolts to counteract loosening from vibrations.
Protect electrical features by covering outlets and heaters when idle. In regions prone to heavy snowfall, remove accumulations lightly with a soft broom to avoid excessive pressure on the frame and mechanisms.
Efficient Storage Strategies
Maximize the pod's functionality by organizing accessories thoughtfully. Place a sealed storage chest under the structure to house cushions, blankets, and floor mats, shielding them from the elements. Divide contents into labeled compartments: one for seasonal textiles and another for maintenance supplies like spare fasteners and cleaning agents.
This approach keeps the area guest-ready and eliminates clutter, allowing quick setup for impromptu gatherings or relaxation sessions.
Enhancing Your Outdoor Experience
Investing in a weatherproof pergola pod unlocks the full potential of your patio, blending indoor comfort with outdoor appeal. By selecting quality materials and following structured installation and care routines, you create a resilient space that withstands the elements while fostering memorable moments year-round. Consider customizing with eco-friendly options or smart integrations to align with your lifestyle and environmental values.