
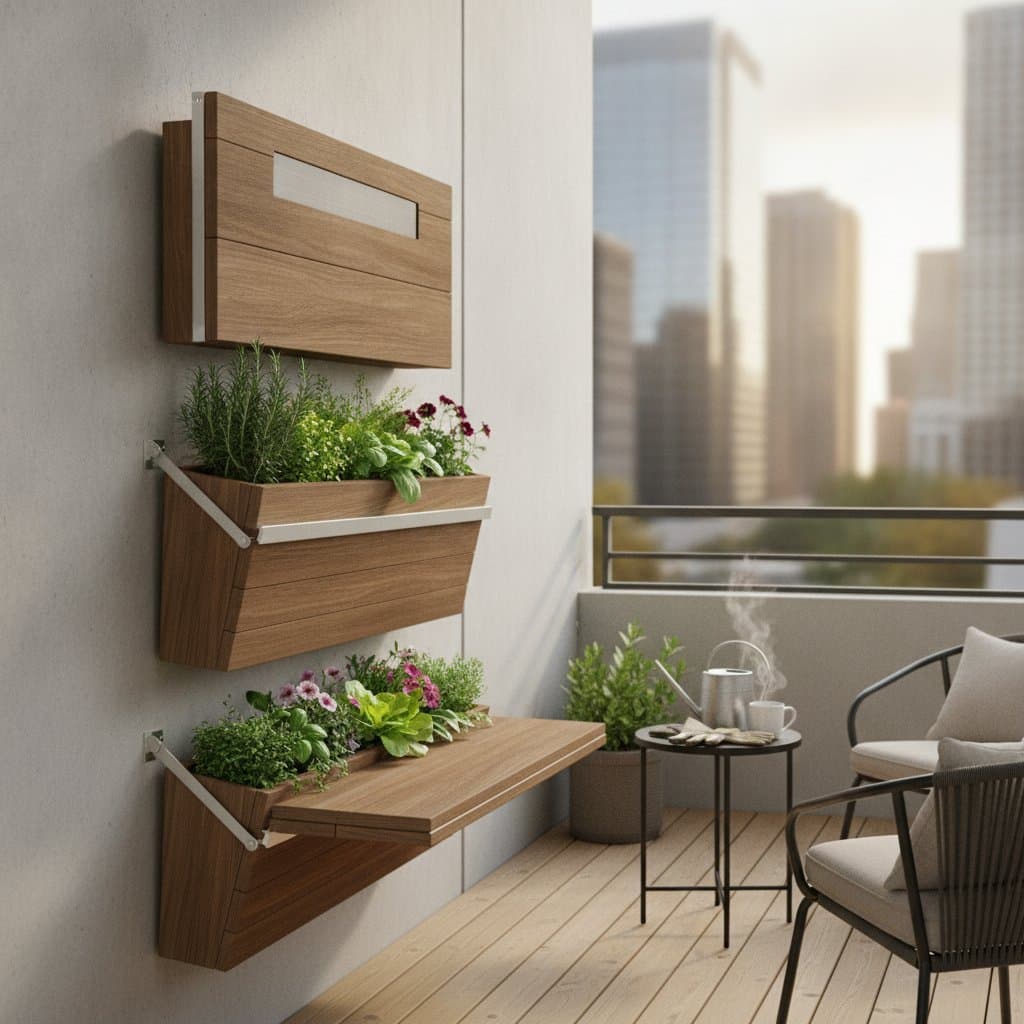
Fold-Down Planters Free Up Two Feet of Balcony Space
Fold-down planters let urban gardeners turn limited balcony railings into productive growing areas. These hinged boxes swing down for planting and fold flat against the wall when not in use. Proper installation keeps weight within safe limits while protecting building surfaces.
Installation Steps
1. Prepare the Mounting Area
Clear the balcony wall of any obstacles and confirm the surface can support the planned load. Gather a level, drill, screws, anchors, and the planter kit before beginning work.
2. Mark and Drill Pilot Holes
Use the level to draw a straight horizontal line where the planter top hinge will sit. Drill pilot holes about 3 inches apart along that line. Insert anchors if mounting into concrete or brick.
3. Attach the Hinges
Secure the hinge plate or wall bracket with screws. Tighten evenly so the hinge swings smoothly. If the planter kit includes a base bracket, fix it now about 8 inches below the top hinge line.
4. Mount the Planter Box
Align the box with the hinges and connect using the provided pins or bolts. Test the fold-down motion several times to confirm it clears the railing and folds flat.
5. Seal and Finish
Apply silicone around screw heads to prevent leaks. For wood planters, coat exposed edges with exterior sealant. For metal ones, use rustproof spray paint on any scratch or cut edge. Let it dry before filling.
6. Add Soil and Plants
Use lightweight potting mix rather than garden soil. A mix labeled container blend drains better and keeps roots from rotting. Fill to 2 inches below the rim to prevent overflow when watering.
Plant herbs like basil, mint, or thyme for compact growth. For flowers, try marigolds or petunias, which stay tidy in small spaces.
Safety Tips
- Weight check: Never overload a fold-down planter. Stay under 50 pounds total per 24-inch section.
- Water flow: Ensure water drains away from your apartment wall to prevent staining or mold.
- Secure hinges: Inspect hinge pins monthly. Replace any that feel loose or rusty.
- Wind protection: If your balcony faces strong gusts, add a small safety chain that limits how far the planter can swing.
Troubleshooting
Problem: The planter tilts forward when loaded.
Cause: Hinges installed too low or wall anchors pulling out.
Fix: Reposition hinges 2 inches higher and use stronger anchors.
Problem: Water drips onto neighbors below.
Cause: Drain holes too large or misaligned.
Fix: Add a drip tray or mesh layer to slow drainage.
Problem: Wood warps after rain.
Cause: Incomplete sealant coverage.
Fix: Sand lightly, reseal all edges, and let cure before replanting.
Budget and Time
Expect to spend 40 to 120 dollars for one fold-down planter kit depending on size and material. Cedar and powder-coated steel cost more but last longer. Anchors and sealant add about 10 dollars.
Installation takes about two hours for one person with standard tools. Painting or finishing adds another hour of drying time.
Save money by building your own using repurposed wood crates or balcony railing planters with added hinges. Just confirm the wood is rot-resistant and the fasteners are stainless steel.
Maintenance
Fold the planter up during heavy storms or high winds. Clean the surface every two weeks to remove dust and algae. Replace soil once per growing cycle to maintain nutrients.
Wipe hinges with oil every few months to keep movement smooth. If hinges squeak or show rust, sand and repaint with outdoor metal primer.
In cold weather, empty the soil and store the planter folded flat under a cover. This prevents cracking or swelling from freeze and thaw cycles.
Smart Storage Moves
Combine fold-down planters with wall hooks or slim shelves for a full vertical garden. Use at least 12 inches between rows so plants have room to grow.
Label each planter with weatherproof tags for easy rotation of herbs or flowers. A small chalkboard strip works well and can be wiped clean each season.
Hang a lightweight watering can or spray bottle on the same wall for quick access. Keep fertilizer and gloves in a small bin beneath a bench to save floor space.
Seasonal Reminders
At the start of each growing season, check hinge screws and reseal any cracked surfaces. Refresh soil with compost or slow-release fertilizer.
Mid-season, trim plants back by one-third to keep them from overhanging the railing. Deadhead flowers weekly to encourage new blooms.
At the end of the season, remove plants, rinse containers, and leave them open to dry for a day before folding down for storage.
When to Call a Pro
Call a contractor or building superintendent if you need to mount planters into concrete walls thicker than 4 inches or metal structures. A pro can confirm load limits and choose the correct anchors.
Pro Tips for Success
- Use three hinges instead of two for wide planters to distribute weight evenly.
- Mix plant types with similar water needs to avoid overwatering one side.
- Add a half-inch gravel layer at the bottom for better drainage.
- Choose matte finishes on planters to reduce glare and heat buildup.
- Keep a small broom nearby to sweep any spilled soil immediately after planting.
Start Your Balcony Upgrade
Measure your available wall space today and select a kit that matches your railing height. Follow the steps in order to create a safe, productive growing area that folds away when storms arrive.