Introduction to Sun-Tracking Shade Sails
Sun-tracking shade sails represent an innovative solution for outdoor shading that adapts to changing light conditions. These structures use automated mechanisms to rotate or adjust the sail fabric, ensuring optimal coverage as the sun moves across the sky. Ideal for urban decks, patios, and gardens, they provide reliable protection from intense sunlight without manual intervention.
The core technology involves light sensors connected to a motorized system. When sunlight shifts, the sensors detect changes in intensity and direct the motor to reposition the sail. This results in shaded areas that remain consistent from morning to evening, reducing heat buildup and glare on surfaces below. Homeowners appreciate the seamless integration with existing outdoor setups, as these sails blend functionality with aesthetic appeal.
Beyond comfort, sun-tracking sails offer practical benefits. They shield furniture and flooring from UV damage, lower ambient temperatures by up to 20 degrees Fahrenheit, and enhance energy efficiency by minimizing the need for indoor cooling during outdoor gatherings. With proper selection and care, these installations deliver years of performance in diverse climates.
How Sun-Tracking Shade Sails Work
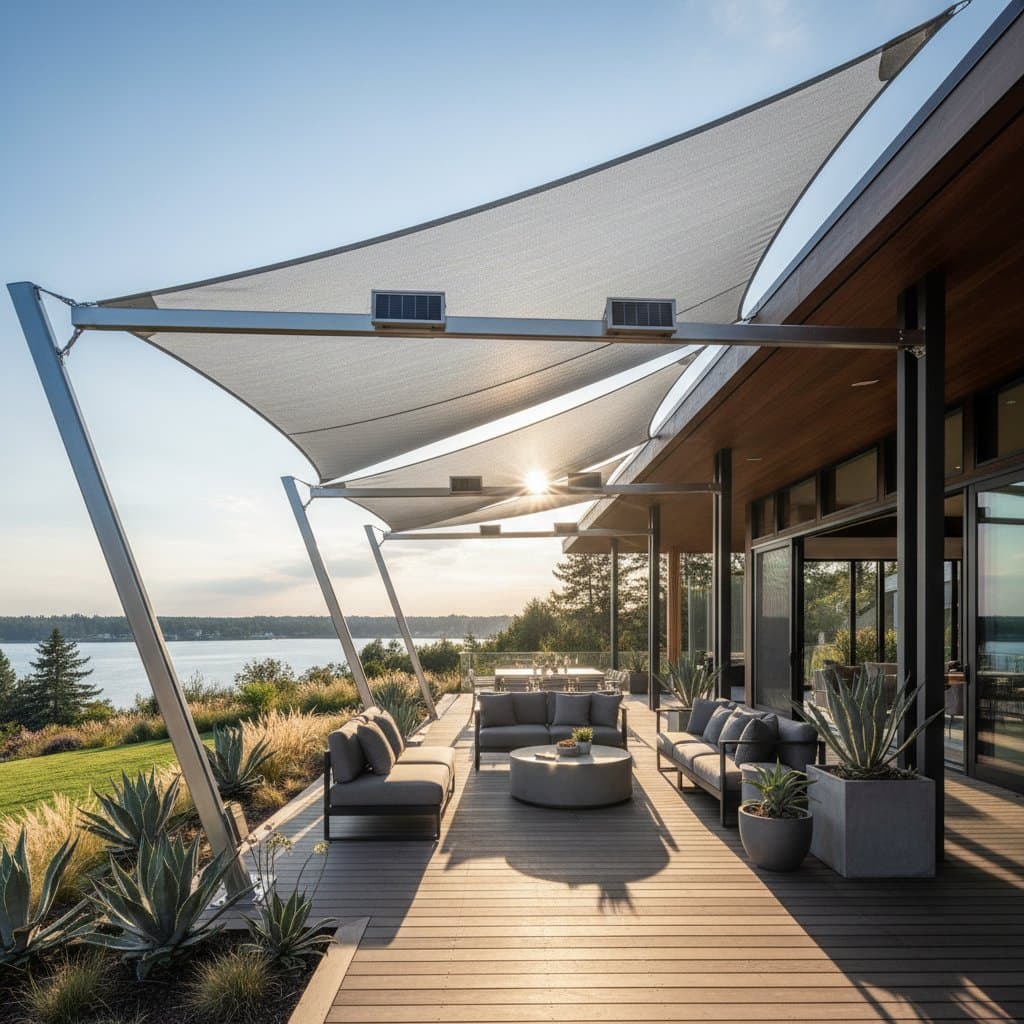
At the heart of the system lies a network of components designed for precision and durability. The sail fabric, typically made from high-density polyethylene or UV-resistant polyester, attaches to a frame of aluminum poles or existing structures. Motors, often solar-powered or wired to a low-voltage supply, drive the adjustment mechanism.
Sensors mounted on the sail or nearby surfaces monitor solar angles. A central controller processes this data and activates the motor to tilt or rotate the sail accordingly. Advanced models include wind sensors that retract the sail during gusts exceeding safe limits, preventing damage. Programming options allow customization, such as scheduling adjustments or manual overrides via a remote or app.
Installation requires consideration of site-specific factors like sun path, wind exposure, and load-bearing capacity. Professional assessments ensure compliance with local building codes, particularly in urban settings where space constraints apply. Costs range from $1,500 for basic kits to $5,000 for custom systems, depending on size, materials, and automation features.
Preparation for Installation
Before beginning, evaluate your outdoor space thoroughly. Measure the area to determine sail dimensions, aiming for coverage of key zones like seating or dining areas. Assess the sun's trajectory using tools like a solar pathfinder or online calculators to predict shading patterns.
Select durable anchor points, such as reinforced posts or wall mounts rated for at least 50 pounds per square foot of wind load. Gather necessary tools: drill, level, wrench set, ladder, and safety gear including gloves and eyewear. Review the manufacturer's manual for model-specific requirements, and consider consulting a structural engineer if attaching to a building facade.
Permits may apply in residential areas, especially for permanent fixtures. Budget for additional expenses like concrete footings or electrical wiring, which can add 20 to 30 percent to the total project cost.
1. Install Anchor Points
Mark positions for posts or attachments, ensuring at least 10 feet of clearance from overhead obstacles. Dig footings to a depth of 36 inches in stable soil, or use expansion anchors on concrete surfaces. Pour concrete around steel posts, allowing 48 hours for curing before proceeding.
Secure wall mounts with lag bolts into studs, verifying alignment with a plumb line. For freestanding setups, brace posts temporarily to maintain verticality during setup.
2. Assemble the Frame
Connect frame components according to the kit instructions, using stainless steel hardware to resist corrosion. Attach motor housings to the main support arms, routing cables away from sharp edges. Test electrical connections with a multimeter to confirm continuity and ground integrity.
Position the frame over the anchors and bolt it securely. Use a level across multiple points to ensure evenness, adjusting as needed to avoid future stress on the fabric.
3. Mount Sensors and Controller
Install light and wind sensors in unobstructed locations, typically on the highest frame point for accurate readings. Wire the controller to a power source, either a dedicated outlet or solar panel setup. Program initial settings, calibrating the system to your latitude for precise sun tracking.
Secure all wiring with weatherproof conduit to protect against moisture and debris. Perform a dry run without the sail to verify sensor responses and motor operation.
4. Attach the Sail
Clip the sail corners to the tension hardware provided. Use a level to check the overall slope, which should measure approximately 15 degrees to facilitate water runoff. Tighten the turnbuckles evenly across all points until the fabric achieves a firm, taut surface without excessive stress.
Inspect for wrinkles or loose edges, making minor adjustments to promote uniform distribution of tension. This step ensures the sail moves freely during automated adjustments.
5. Test the Tracking Mechanism
Activate the controller and switch to automatic mode. Observe the sail as it cycles through its full range of motion, noting any binding or hesitation. Verify that tension remains stable throughout the test, and fine-tune sensor sensitivity to balance responsiveness with minimal unnecessary movements.
Run extended simulations mimicking a full day of sun exposure to confirm reliability. Address any irregularities before finalizing the setup.
Troubleshooting Common Issues
Most operational challenges arise from environmental factors or minor misalignments. Regular checks prevent escalation of problems.
Sail fails to move: Inspect the power connection and replace any blown fuses. If the motor produces a humming sound without rotation, excessive tension might be the cause; loosen one turnbuckle by a quarter turn and retest.
Inconsistent shading coverage: Clean sensors thoroughly to remove dust, pollen, or bird droppings that could interfere with light detection. Recalibrate if misalignment persists.
Sagging or wrinkling fabric: Identify the corner with the least tension and tighten it by one or two turns on the turnbuckle. Even application of force across the sail eliminates distortions.
Frequent system resets: Measure the power supply voltage for consistency; install a surge protector in areas prone to electrical fluctuations to stabilize performance.
Quick interventions, such as a sensor wipe or tension adjustment, resolve 90 percent of issues within minutes. Document recurring problems to inform future maintenance.
Maintenance Routines
Consistent upkeep extends the lifespan of sun-tracking shade sails to 8 to 10 years, often matching motor warranty periods.
Monthly tasks:
- Gently wipe sensors with a soft, lint-free cloth to maintain sensitivity.
- Activate auto mode for a full cycle to confirm unobstructed movement.
- Examine cables for seals and dryness, resealing any compromised areas.
Semiannual inspections:
- Wash the sail using mild soap and lukewarm water; rinse thoroughly and avoid harsh chemicals like bleach.
- Check seams and edges for signs of fraying or wear.
- Apply lubricant to motor gears and pivot points to ensure smooth operation.
Seasonal storage advice: For winter removal, rinse the sail, allow complete drying, and store it flat in a shaded, ventilated area. Prevent mildew by avoiding folded, damp storage.
Track maintenance in a log to predict part replacements and uphold warranty claims.
Engaging Professional Assistance
Certain issues demand expert intervention to avoid safety risks or voiding warranties. Seek professionals for electrical or structural concerns.
Contact a licensed electrician for frayed wiring, permanent power integrations, or controller synchronization failures. Deck contractors handle sagging supports, shifting foundations, or reinforcement needs.
When consulting experts, inquire about:
- Certification for wind load resistance.
- Waterproofing standards for electrical components.
- Comprehensive warranty coverage for motors and fabrics.
Annual professional inspections, typically costing $200 to $400, prevent costly overhauls and ensure long-term stability.
Implementing Your Shade Solution
Sun-tracking shade sails elevate outdoor experiences by delivering adaptive shade that aligns with daily routines. They reduce visual discomfort, safeguard materials, and operate autonomously to maximize usable space.
Begin with a single sail positioned over primary activity zones to assess effectiveness. Monitor adjustments over several days, evaluating temperature drops and shading consistency. Scale up by adding sails for broader coverage once initial results prove satisfactory.
Adopt these practices for sustained reliability:
- Perform monthly sensor cleanings to preserve tracking accuracy.
- Adjust hardware tension at the start of each season.
- Retract the sail ahead of high winds or extended vacancies.
Dedicated care transforms your deck into a resilient, inviting haven, ready for seasons of enjoyment.