Pergola Pods Turn Decks Into Weatherproof Living Spaces
A deck functions as an extra room until wind, rain, or intense sun forces occupants indoors. A pergola pod alters this dynamic. It serves as a semi-enclosed structure equipped with adjustable roofing and side panels that render outdoor space functional across nearly all weather conditions. The objective centers on converting a deck into a weatherproof living zone suitable for year-round use.
This guide details the nature of pergola pods, their effectiveness in urban environments, and procedures for installation, maintenance, and budgeting. Readers will also identify situations that warrant professional assistance and discover upgrades that enhance style, durability, and comfort.
Overview
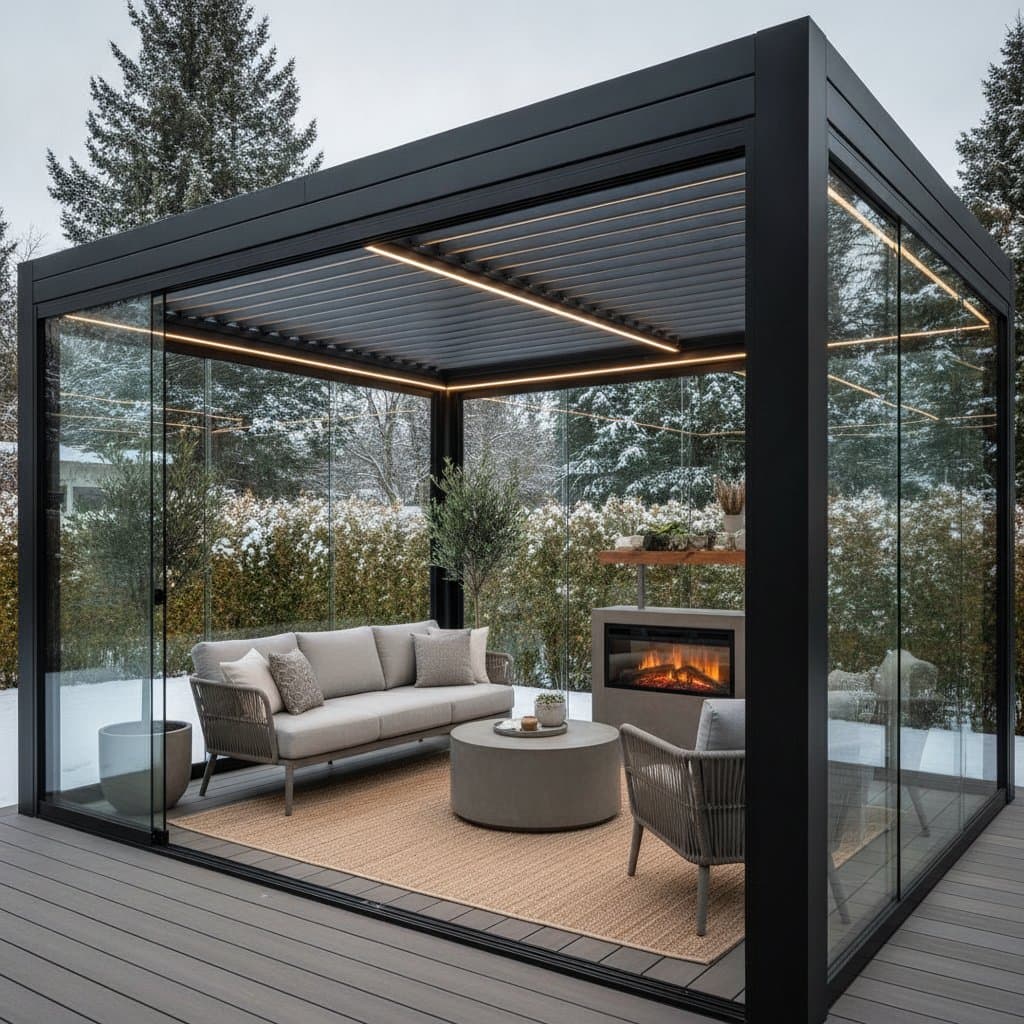
A pergola pod merges open-air aesthetics with the protection of an enclosed room. Standard frames measure 10 by 10 feet or 12 by 12 feet, which accommodates a dining set or lounge seating. Roof panels tilt or slide to deflect rain or admit sunlight. Certain models incorporate retractable walls or clear screens that block wind without obstructing views.
The structure operates as a modular outdoor room that shields deck surfaces and furnishings from weather exposure. A properly sealed unit can decrease water contact by up to 80 percent, which prolongs the lifespan of wood decking and cushions. Urban properties gain additional usable area without extensive construction.
Key Benefits
- Shields furniture and flooring from rain and ultraviolet rays
- Enhances privacy and reduces external noise
- Supports addition of heating or cooling elements
- Increases property value through a compact addition
Required Tools and Materials
Installation demands precise measurements and standard equipment. Most kits supply the frame, roof panels, and mounting brackets. Essential items include a tape measure of at least 25 feet, a cordless drill with bit assortment, a level, a square, concrete anchors or deck screws, silicone sealant, and protective gloves with eye gear.
Two individuals should handle frame sections. A typical kit weighs between 200 and 400 pounds.
Installation Steps
Measure and Mark the Layout
Measure the deck surface and maintain at least 6 inches of clearance from house siding or railings. Mark post positions with chalk or painter tape.
Verify Structural Capacity and Permits
Confirm that the deck supports the additional load. Most decks accommodate 50 pounds per square foot. Local regulations may require a permit for overhead structures.
Assemble the Base and Posts
Position the base rails and secure corner posts with supplied bolts. Verify plumb alignment with a level before tightening each connection.
Attach the Roof Frame and Panels
Secure roof crossbars and position the panels according to manufacturer sequence. Ensure drainage channels face outward. Gloves protect against sharp metal edges.
Seal Joints and Verify Operation
Apply silicone sealant at seams. Test roof movement for smooth function. Adjust hinge bolts if resistance occurs.
Install Side Screens or Curtains
Mount retractable screens on supplied tracks. Attach fabric curtains with weatherproof hooks and stainless grommets.
Final Securing and Cleaning
Torque all bolts and clear debris from drainage tracks. Rinse the roof to remove residue.
Safety Considerations
Secure ladders on stable surfaces. Avoid installation during wind or rain. Wear gloves during panel handling. Engage a licensed electrician for any wiring tasks.
Common Issues and Solutions
Roof leaks often result from gaps in panel overlaps. Apply clear silicone where light passes through. Jammed panels typically stem from debris in tracks. Clean with a brush and mild soap solution. Frame movement requires tightening of anchor bolts into solid material. Condensation improves with added roof beam vents.
Ongoing Maintenance
Clean roof panels twice each season with a soft brush and hose. Inspect bolts for corrosion and apply outdoor paint to exposed areas. Lubricate moving components annually with silicone spray. Wash fabric elements with mild detergent and allow complete drying before storage.
In regions with snowfall, remove accumulation using a soft broom to prevent panel deformation.
Storage Practices
Store removable panels upright in a dry location. Separate layers with foam to prevent surface damage. Keep hardware in labeled containers. Fold fabric items only after they are dry and place them in breathable containers.
Cost and Time Expectations
Basic aluminum kits range from 1800 to 3000 dollars. Motorized or lighted versions may exceed 6000 dollars. Two people complete assembly in 6 to 10 hours. Professional installation adds 500 to 1000 dollars based on site conditions.
Situations Requiring Professional Help
Engage specialists when deck reinforcement is necessary or when electrical or gas heating elements are involved. Verify insurance coverage and specify corrosion-resistant hardware. Contractors experienced with rooftop or balcony installations account for drainage and load requirements.
Seasonal Maintenance Schedule
Spring requires seal inspection and touch-up painting. Summer calls for periodic roof opening to release heat. Fall involves clearing leaves from tracks. Winter includes anchor checks before added snow or ice loads.
Planning Your Installation
A pergola pod delivers indoor comfort with outdoor ambiance. Begin with deck measurements and model selection. Reserve time for assembly or arrange professional service. Incorporate lighting, seating, and climate control once the structure is in place.