Understanding Solar Pergolas for Rooftop Enhancement
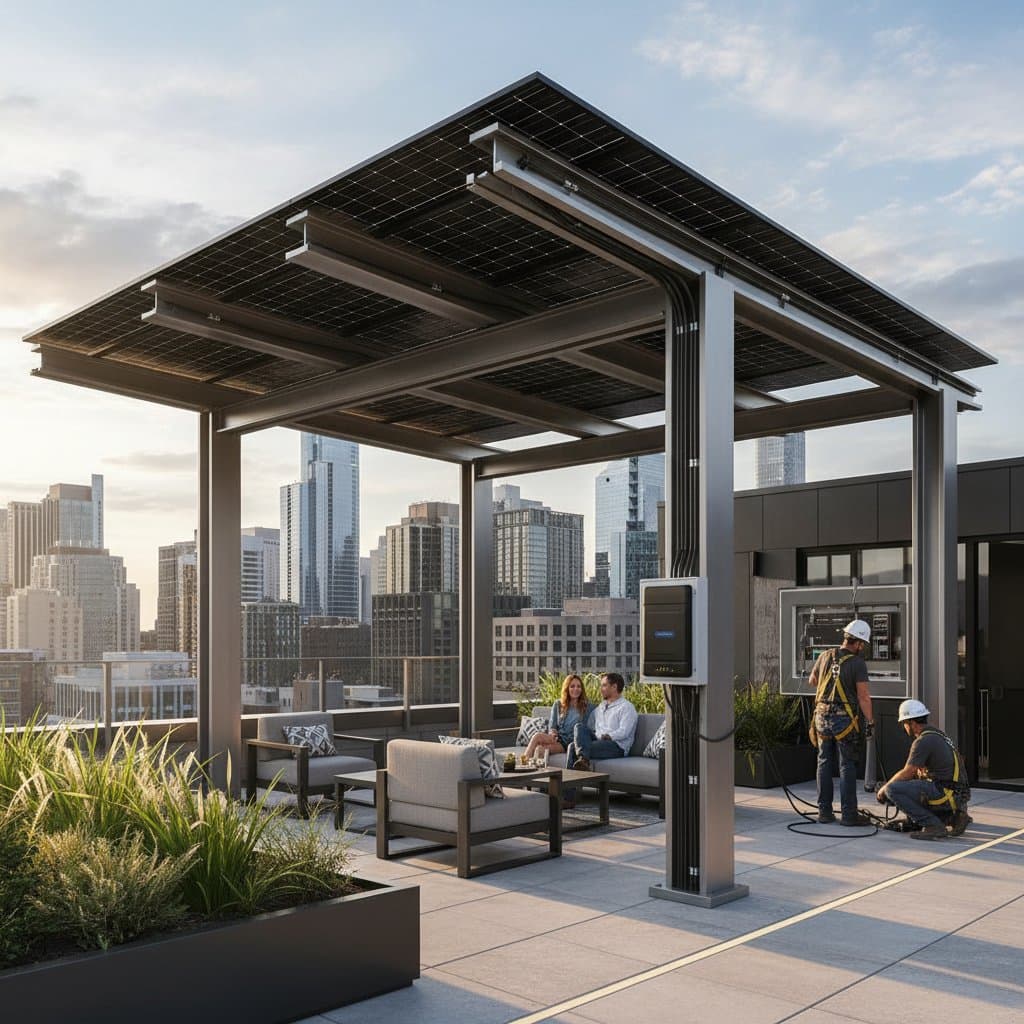
Rooftops in urban environments often serve limited purposes, such as holding planters or seating. A solar pergola redefines this space by combining structural shade with renewable energy generation. This integration allows homeowners to enjoy comfortable outdoor areas while offsetting electricity costs through on-site power production.
The design process begins with assessing your roof's load capacity and sunlight exposure. Solar pergolas typically feature an open lattice roof covered by photovoltaic panels, which capture sunlight and convert it into usable electricity. By aligning the structure with your daily energy needs, you create a multifunctional addition that supports sustainable living.
Essential Tools and Materials
Preparation forms the foundation of any successful solar pergola project. Select materials that withstand weather exposure and support the weight of solar components. Consult local regulations early to ensure compliance with zoning and structural standards.
Structural Components
- Pressure-treated lumber, extruded aluminum, or galvanized steel for posts and beams, sized at 4x4 inches for lighter loads or 6x6 inches for heavier installations.
- Corrosion-resistant galvanized bolts, lag screws, and adjustable brackets for secure assembly.
- Heavy-duty concrete footings or specialized rooftop mounting kits with rubberized seals to prevent leaks.
Solar System Elements
- Monocrystalline or polycrystalline solar panels, with 8 to 12 units covering 200 to 400 watts each for a standard 10x10-foot pergola.
- A grid-tied or hybrid inverter, rated at 3 to 5 kilowatts, to transform DC output into AC power for home use.
- UV-resistant electrical conduit, weatherproof wiring, and junction boxes compliant with National Electrical Code standards.
- Aluminum mounting rails with stainless-steel clamps to secure panels at optimal tilt angles, usually 20 to 30 degrees for northern latitudes.
- Optional lithium-ion battery bank, such as a 5 to 10 kilowatt-hour system, for energy storage during peak production times.
Required Tools
- Cordless power drill with assorted bits and a torque driver for precise fastening.
- Digital level, retractable measuring tape, and laser distance measurer for accurate alignment.
- Adjustable wrench set and socket kit for tightening hardware.
- Sturdy extension ladder or modular scaffolding system certified for rooftop access.
- Personal protective equipment, including impact-resistant gloves, hard hat, safety glasses, and a full-body harness with lifeline.
Prioritizing Safety During Installation
Safety remains paramount on elevated work surfaces like rooftops. Begin by inspecting the roof for stability and clearing debris to avoid slips. Secure all equipment and personnel to mitigate fall risks, which account for a significant portion of construction injuries.
Key protocols include attaching a harness to a fixed anchor point before ascending. Avoid operations during rain, high winds exceeding 15 miles per hour, or low-visibility conditions. Disconnect the main electrical supply and use a voltage tester when integrating solar wiring to prevent shocks.
Handle sharp edges on metal frames with padded gloves, and verify that all connections meet torque specifications from manufacturer guidelines. After assembly, conduct a walkthrough to confirm no loose parts or exposed wires, reducing the potential for structural failure or electrical hazards.
Estimating Costs and Timeline
A mid-sized solar pergola, measuring 10x12 feet, typically ranges from $4,500 to $9,000 in total cost. Solar panels and inverters represent 40 percent of expenses, while framing materials add another 30 percent. Hiring a licensed electrician for wiring increases costs but ensures code compliance and warranty validity.
Aluminum frames offer superior durability against rust, justifying a 20 percent premium over wood alternatives. Homeowners can reduce expenses by 10 to 20 percent through self-assembly of the frame, provided they possess basic carpentry skills. Factor in potential rebates from utility programs or federal incentives to offset initial investments.
Allocate three to four full days for the project with a two-person team. Day one focuses on site preparation and foundation setting. Days two and three involve erecting the frame and installing panels. The final day handles electrical connections, system testing, and cleanup.
Optimizing Storage Under the Pergola
Space efficiency enhances the appeal of rooftop living. The shaded underside of a solar pergola provides ideal locations for integrated storage solutions. Incorporate built-in benches with hinged seats to store outdoor cushions, gardening supplies, or emergency kits without encroaching on usable area.
Install wall-mounted hooks or racks for collapsible furniture, such as stackable chairs or side tables, keeping floors clear for movement. For grilling enthusiasts, position a lockable, ventilated steel enclosure for propane tanks at least three feet from electrical components to comply with fire safety codes.
Integrate a compact, sealed battery enclosure beneath the bench to capture surplus energy. This arrangement powers low-voltage LED string lights or USB charging ports during evening use, promoting off-grid independence and extending the pergola's utility into nighttime hours.
Installation Steps for Success
Begin by marking the pergola footprint on the roof, ensuring at least two feet of clearance from edges and vents. Dig or secure footings according to soil or roof type, allowing concrete to cure for 24 hours if applicable.
Assemble the frame on the ground where possible, then hoist sections into place using ropes or a pulley system. Attach beams with pre-drilled holes and tighten bolts progressively to avoid warping. Position solar panels on rails, securing them with clamps and sealing edges with silicone caulk.
Route wiring through conduits, connecting panels in series or parallel based on inverter specifications. Test the system incrementally: first for voltage output, then for inverter functionality, and finally for grid synchronization. Document all steps with photos for future reference or permitting.
Identifying When Professional Help Is Needed
Regular inspections reveal issues before they escalate. Look for visible damage like hairline cracks on panel surfaces or fading in color, which indicate reduced efficiency. Check conduits for moisture ingress, as water can corrode connections and lead to system failures.
Monitor for frame instability, such as beams shifting under light loads or posts showing signs of rot. Frequent inverter errors, including unexpected shutdowns or error codes, signal underlying problems like mismatched components.
Engage a certified solar technician for in-depth analysis. They measure actual kilowatt-hour production against projections, often using thermal imaging to detect hot spots. Professionals can recommend upgrades, such as panel cleaning or firmware updates, to restore peak performance.
Maximizing Long-Term Benefits
A solar pergola delivers ongoing value by merging shade with energy savings, potentially recouping costs within five to seven years through bill reductions. Track monthly output via the inverter's app or meter to identify patterns, such as seasonal dips from shading.
Adjust panel angles biannually to capture optimal sunlight, and clean surfaces quarterly with a soft brush and mild soap to remove dust buildup. These habits sustain efficiency above 80 percent, while the shaded structure extends comfortable rooftop use across seasons.
Expand gradually by adding panels or integrating smart controls for automated energy management. This approach not only lowers environmental impact but also elevates property appeal in competitive urban markets.