
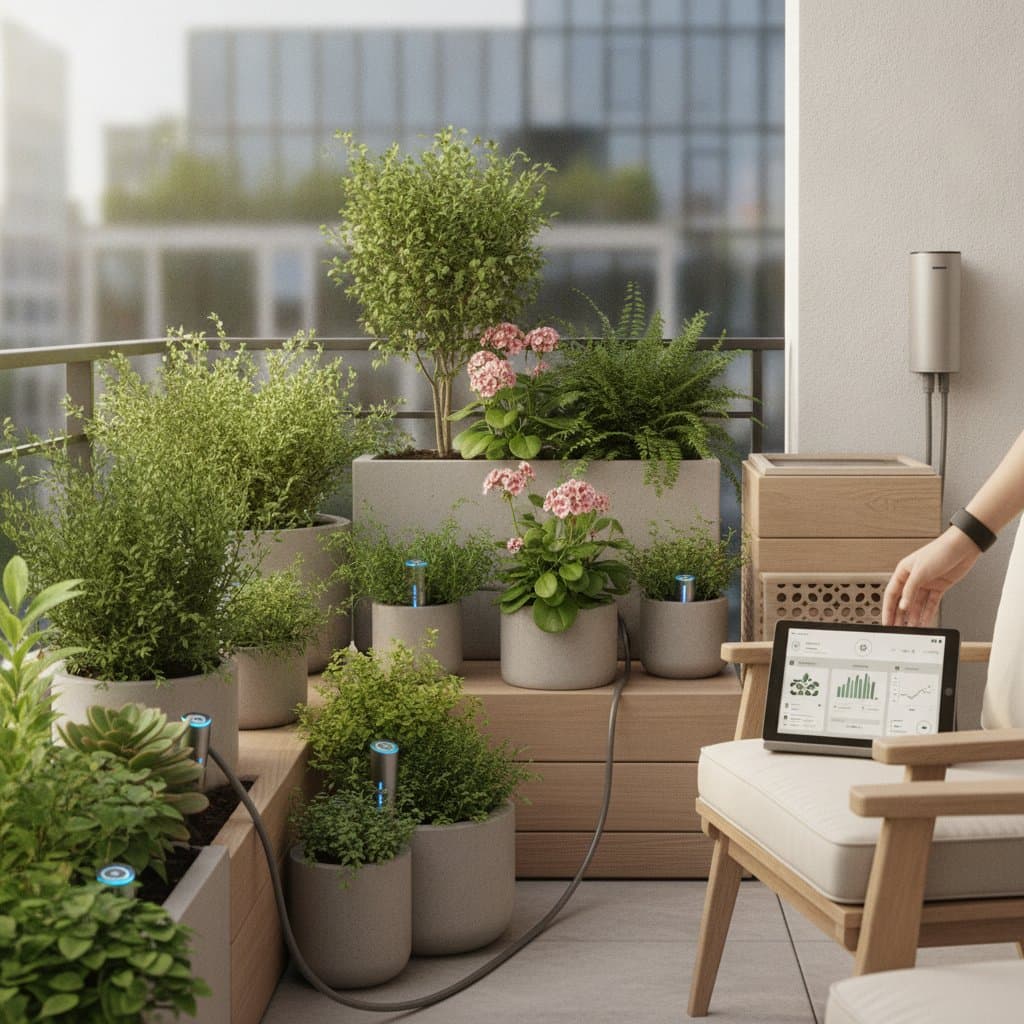
AI Sensors Keep Balcony Plants Alive During Travel
A balcony garden can dry out quickly when heat, wind, and small containers work together. AI garden sensors help by measuring soil moisture and adjusting watering when plants need it.
Your goal is simple: keep balcony plants healthy without asking a neighbor to guess how much water each pot needs. This guide explains how smart watering systems work, how to set one up safely, and how to avoid common mistakes.
How These Systems Work
An AI sensor watering system combines soil sensors, a controller, and a water delivery device. The sensor checks moisture in the potting mix. The controller uses that reading, along with plant settings and recent watering data, to decide whether a pump or valve should open.
Basic systems follow a fixed schedule. Smart systems respond to conditions. A sensor may water a basil pot when the soil becomes dry, while leaving a succulent alone for longer. Some systems also use weather data, temperature readings, light levels, or a forecast to reduce unnecessary watering.
This matters on balconies because containers hold less soil than garden beds. A 12 inch pot, about 30 centimeters wide, can lose moisture quickly in direct sun. Wind can dry leaves and soil even when the air feels comfortable.
A well-adjusted system can reduce missed waterings during travel, limit runoff that stains walls or annoys neighbors, deliver water directly to the root zone, save time during busy mornings, and help you notice leaks, blocked tubes, or unusually dry soil.
The system still needs human care. Sensors can fail, batteries can weaken, and plants can outgrow their containers. Use automation as a helper, not a replacement for regular checks.
Choosing Equipment
Choose equipment that matches your balcony size, water source, and plant needs. A small setup can serve four to eight containers with basic parts.
You may need one smart irrigation controller with an app, one soil moisture sensor for each plant group or one sensor for matching pots, one water reservoir such as a 2 to 5 gallon container about 8 to 19 liters, one low voltage pump rated for container irrigation, one quarter inch irrigation tube usually 25 to 50 feet about 8 to 15 meters, one adjustable drip emitter per plant or two for a large pot, one backflow check valve if the kit includes one, cable ties or outdoor clips, waterproof labels, a charged battery or protected outdoor power supply, and potting mix, mulch, and a saucer for each container.
Group plants with similar moisture needs. Herbs and leafy greens often prefer more consistent moisture. Cacti, succulents, and plants with thick leaves need longer dry periods.
Select a sensor with a probe designed for soil. Avoid placing exposed electronics where rain can collect. If you rent, use removable clips and a freestanding reservoir instead of drilling into railings or walls.
Setting Up Your System
Map the balcony
Place each pot where it will normally stay. Record the pot size, plant type, hours of direct light, and whether wind reaches it. Keep the reservoir upright and close to the pots. A location within 6 feet, about 1.8 meters, of the plants can reduce tubing clutter and pump strain.
Group compatible plants
Create separate groups for thirsty plants, moderate water users, and dry soil plants. Put each group on its own sensor when possible. One sensor can guide several similar pots, but place it in the pot that dries fastest. Do not use a basil pot sensor to control a cactus.
Prepare the reservoir
Clean the container and fill it with fresh water. Keep the lid mostly closed, but allow the pump cable and tubing to pass without sharp bends. Set the reservoir on a stable surface that can handle its weight. Water weighs about 8.3 pounds per gallon, or 1 kilogram per liter, so a full 5 gallon container weighs more than 40 pounds, about 19 kilograms.
Install the moisture sensors
Water each pot by hand until excess drains from the bottom. Wait about 15 minutes, then insert the probe into the root zone, usually 2 to 4 inches deep, or 5 to 10 centimeters. Avoid pushing through a dense root ball. Insert the probe near the center of the pot, away from the edge where soil dries faster.
Keep sensors, plugs, and controllers away from standing water, and use outdoor rated power equipment.
Connect the pump and tubes
Place the pump at the bottom of the reservoir. Connect the main tube, then run a branch to each pot. Cut tubing cleanly and push fittings fully into place. Secure lines with clips so they do not become a trip hazard or hang over the balcony edge.
Position the emitters
Place one emitter near the plant stem but not directly against it. For a pot larger than 14 inches, about 36 centimeters, use two emitters on opposite sides. Pin the emitter in place with a small stake. Make sure water enters the soil instead of running down the outside of the pot.
Pair the controller
Install the manufacturer app and connect the controller to your home network if required. Name each zone with a plain label, such as herbs, flowers, or dry pots. Enter the plant type, container size, and preferred moisture range. Start with a conservative setting. Too much water can damage roots faster than one missed cycle.
Test the system
Run a manual watering cycle while you watch every pot. Check for leaks, weak flow, loose emitters, and water collecting in saucers. Measure the output into a cup for 5 minutes. If an emitter delivers 1 gallon per hour, about 3.8 liters per hour, it should release roughly 1.3 cups, about 300 milliliters, during that test.
Adjust the moisture range
Let the system operate while you remain home. Check the soil with your finger and compare it with the sensor reading. Raise the dry threshold if leaves wilt before watering begins. Lower the watering amount if the soil stays wet or drainage continues long after a cycle.
Test remote alerts
Disconnect the reservoir or tilt a sensor slightly to trigger an alert, if the system supports alerts. Confirm that notifications reach your phone. Reset the equipment after testing. A system that cannot notify you about an empty reservoir gives less protection while you are away.
Safety Considerations
Balcony watering creates risks for plants, people, buildings, and neighbors. Keep water away from electrical outlets and extension connections. Never allow tubing to cross a walking path. Use a reservoir instead of attaching equipment to a shared faucet unless building rules permit it. Keep containers and reservoirs inside the balcony approved load limits. Secure every pot against strong wind. Empty saucers when they hold standing water for long periods. Do not let runoff drip onto lower balconies or public walkways.
Do not modify building plumbing, railings, or electrical systems without permission. A licensed electrician should handle permanent outdoor wiring.
Common Problems and Solutions
The soil stays wet
The watering threshold may be too high, the emitter may be too large, or the pot may lack drainage. Pause automation, move the plant into brighter airflow if suitable, and confirm that the drainage holes are open.
The plant remains dry
Check whether the probe sits in a dry pocket, the pump is submerged, and the tube has a kink. Run a manual cycle and watch the emitter. Move the probe closer to the main root zone if its reading does not match the soil.
One pot gets too much water
The pot may have a faster emitter or a lower position that collects runoff. Use a smaller emitter, raise the container, or give that pot its own zone.
Alerts arrive too often
Poor WiFi, low batteries, and loose sensor connections can cause repeated warnings. Replace batteries, move the controller closer, and clean sensor contacts according to the product instructions.
Ongoing Maintenance
Inspect the system once a week when you are home. Look for leaks, algae, insects, blocked emitters, and dry tubing. Clean the reservoir at least once each month during active use. Rinse it, wipe away residue, and refill it with clean water. Do not add fertilizer unless the pump and tubing manufacturer allows it.
Check soil by hand even when the app looks normal. Sensor readings can drift when probes corrode, move, or lose contact with the soil. Prune crowded growth so air can move around leaves. Rotate pots when safe to keep light exposure even. Replace compacted potting mix when water runs straight to the sides instead of soaking in.
Preparing for Storage
Before storing the system, disconnect power and remove the pump from the reservoir. Drain every tube and allow parts to dry fully. Wipe sensors with a soft cloth. Do not scrape probe surfaces with metal tools. Remove batteries from the controller if the manufacturer recommends it.
Coil tubing loosely and store it away from sunlight, heat, and sharp objects. Label each zone before packing it away. Keep small fittings in a sealed bag so they do not disappear between uses.
Planning Your Next Trip
With a properly configured system, you can leave for several days without worrying about plant care. The sensors monitor conditions continuously and respond to actual needs rather than fixed schedules. This approach reduces both underwatering and overwatering risks that often occur with manual care or neighbor assistance.
Test the complete setup at least one week before departure. This gives you time to adjust thresholds and confirm that alerts reach your phone reliably. When you return, review the system logs to see how conditions changed during your absence and refine settings for future trips.