
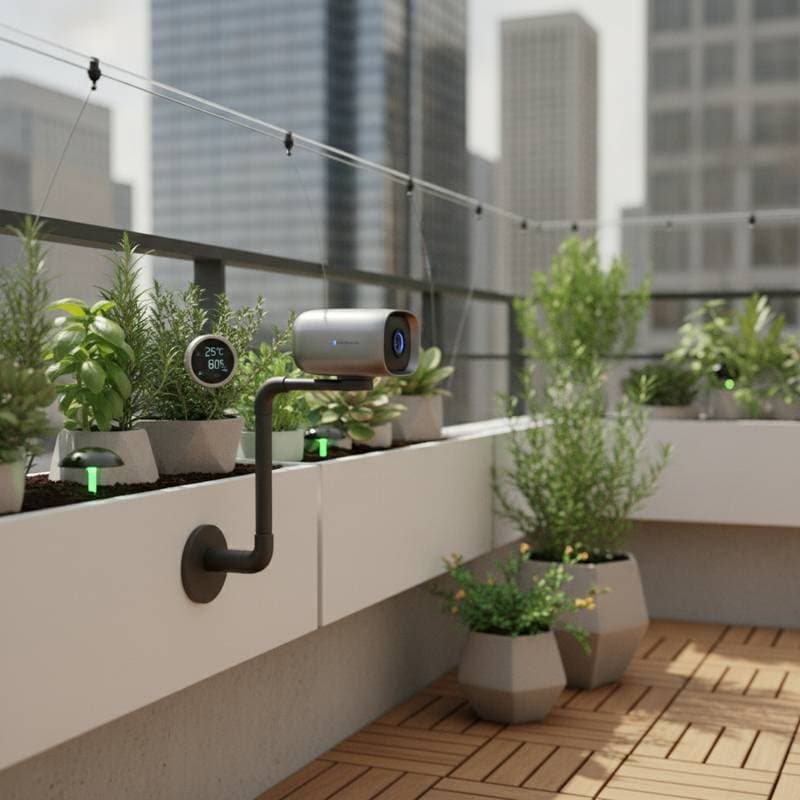
Smart AI Cameras for Effortless 24/7 Balcony Garden Care
Your balcony plants need steady attention, yet you cannot always be there to check on them. Smart AI cameras now make it possible to care for your balcony garden at any hour, even when you are away. With these compact devices, you can track plant health, watering needs, and light exposure using real-time images and data. The goal is simple. You get healthier plants with less guesswork.
This guide explains what these cameras do, what to look for, and how to use them safely and efficiently in an urban balcony setting.
Overview
A smart AI camera is a small device that uses built-in sensors and image recognition software to monitor plant conditions. It can detect dry soil, fading leaves, or too much sunlight. Many models connect to your phone or tablet through an app, sending updates or suggestions. You can see live views or get alerts when something needs attention.
These cameras work best for people short on time or space. A balcony garden changes fast due to weather shifts, reflected heat from buildings, or limited airflow. Automated monitoring keeps you informed before small issues turn into plant loss.
Tools and Materials
You need only a few items to start:
- AI garden camera, one per 8 to 10 square feet of space
- Stable Wi-Fi connection for data transfer
- Power source, either a small outlet or USB solar panel
- Mounting bracket or tripod rated for outdoor use
- Mobile app provided by the camera brand
Optional accessories include a moisture probe, light meter, or weather cover if your balcony is exposed to strong rain.
Steps
1. Plan camera placement
Choose a vantage point that shows several plants within one frame. Place the camera about 3 feet (0.9 meters) above the planters. This height captures leaf growth and soil color clearly. Avoid blocking airflow or covering leaves.
2. Mount securely
Use the bracket or tripod to avoid tipping. Tighten all screws. If wind is strong, add a small sandbag for weight. A steady camera means clearer images and fewer false alerts.
3. Connect to Wi-Fi
Follow the app setup. Keep the router within 30 feet (9 meters) of the camera for stable signal strength. Most apps show a signal bar so you can confirm connection before final placement.
4. Calibrate sensors
Run the first scan during daylight. The app will ask for reference images of healthy leaves and soil. This helps the AI learn your plants' normal condition. The calibration takes about five minutes.
5. Set alert preferences
Choose what matters most. You can get notifications for low soil moisture, poor light, or pest movement. Start with one or two categories to avoid alert fatigue.
6. Review data
Check the app once a day or a few times per week. The AI will highlight trends such as dropping leaf color or inconsistent watering. Use this data to adjust your routine.
7. Clean the lens
Wipe the lens weekly with a soft cloth. Dust or water spots can distort readings. If your balcony faces the street, grime can build up faster.
Safety Tips
- Keep cables away from wet areas. Use waterproof tape or conduit.
- Do not mount over railing edges where it could fall.
- Unplug power during heavy storms.
- Follow manufacturer voltage limits. Overloading outlets can cause short circuits.
Safety keeps your setup reliable and avoids electrical issues near plants.
Troubleshooting
Blurry images: Recheck focus and clean the lens.
Frequent false alerts: Adjust sensitivity in the app or move the camera slightly.
Connection drops: Bring the router closer or install a Wi-Fi extender.
Battery drains fast: Reduce live stream time or use solar backup.
Most issues relate to connection strength or exposure. Small adjustments usually fix them.
Budget and Time
Setup takes about one hour for one camera. Basic models cost between sixty and one hundred dollars. Premium versions with soil sensors or night vision reach two hundred. The main cost driver is resolution and AI depth. A solar charging kit adds about thirty dollars but cuts cord clutter.
Keep each camera tested for at least one week before buying more units. This avoids overspending on unnecessary coverage.
Maintenance
Clean lenses weekly and check mounts monthly. Update firmware when prompted to keep your AI learning current. Inspect cords every few months for wear. A short inspection takes less than ten minutes and prevents failures later.
If your camera tracks plant growth automatically, back up photos or data every few months. Storage may fill quickly with time-lapse images.
Seasonal Reminders
Spring: Recalibrate sensors as new plants appear. Bright light conditions can shift the AI's readings.
Summer: Watch for overexposure and heat stress. The camera can help you adjust shade cloth or watering times.
Autumn: Move cameras slightly closer to catch lower sun angles.
Winter: Protect devices from freezing temperatures. Some models can run on indoor mounts aimed through a window.
Seasonal checks keep your system accurate all year.
Smart Storage Moves
Store extra cables, attachments, and cleaning cloths in a labeled box near the balcony door. Keep silica packs inside to reduce moisture. If you own more than one camera, label each by location such as "Herb Rail" or "Corner Pots." Clear labeling saves time during maintenance or upgrades.
When to Call a Pro
Call a professional if you plan to wire multiple cameras into a shared power system or if you need waterproof conduit installation. Ask for experience with low-voltage outdoor wiring.
Ongoing Benefits
Smart AI cameras turn balcony gardening into a low-stress routine. Start with one camera, test its view, and learn how its alerts fit your habits. Add more units only when the first proves accurate.
Today, you can set up a single camera, calibrate it, and know your plants are watched day and night. That small step keeps your balcony garden thriving, even when you are away.