
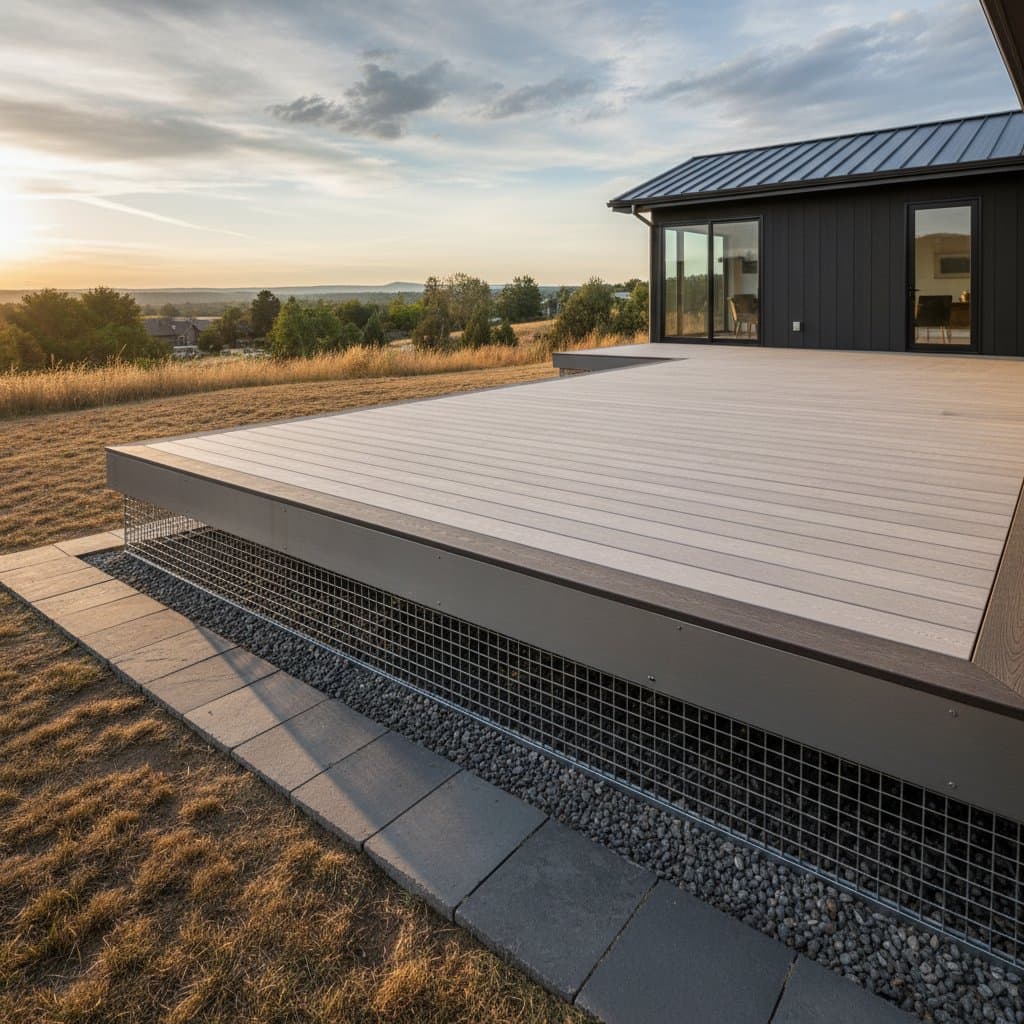
Design Fire-Safe Deck Zones with Ember-Resistant Borders
A wood deck brings comfort and value to a home. In wildfire-prone areas, however, it can also increase risk when embers travel long distances and land on dry leaves, furniture, or gaps between boards. The objective is to create defined fire-safe zones that resist ember spread and provide critical minutes of protection. Careful layout, appropriate materials, and consistent spacing achieve this result.
Overview
A fire-safe deck zone consists of defined areas around and beneath the deck that limit fire and ember access to combustible surfaces. The design divides the space into layers that begin nearest the house and extend outward. Each layer receives specific materials and a maintenance plan. The approach functions for both ground-level and raised decks.
Tools and Materials
- Tape measure and chalk line
- Shovel and rake
- Gravel or decomposed granite (one cubic yard per 100 square feet)
- Metal flashing or ember-resistant mesh with 1/8 inch openings
- Non-combustible pavers or concrete edging 12 to 18 inches wide
- Fire-retardant deck sealant (one gallon per 200 square feet)
- Work gloves, safety glasses, and dust mask
Steps
Step 1: Clear the first five feet
Remove leaves, mulch, and wood chips within five feet of the deck. Replace the material with gravel or stone to form a non-combustible border that prevents embers from igniting ground cover. Maintain a minimum depth of two inches for complete coverage.
Step 2: Seal and inspect deck boards
Apply fire-retardant sealant to all exposed wood surfaces. Work the product into joints and edges. Reapply the sealant every two to three seasons or after periods of heavy use. The coating slows ignition and limits surface spread when embers land nearby.
Step 3: Add ember-resistant screening
Install metal mesh beneath the deck to block embers while permitting airflow. Use mesh with 1/8 inch openings and fasten it with screws or staples every six inches. Inspect all corners and seams to eliminate gaps. This measure prevents embers from accumulating under boards or joists.
Step 4: Create hardscape borders
Place pavers, stone, or concrete edging around the deck perimeter in a strip 12 to 18 inches wide. The border doubles as a walking path and visual frame for outdoor furniture. Avoid wood edging or plastic trim that can melt or ignite.
Step 5: Space and stage furniture safely
Position flammable items such as cushions, planters, and umbrellas at least two feet from walls or railings. Select metal or stone tables when possible. Store soft goods indoors during periods of elevated fire risk.
Safety Tips
- Wear gloves and a dust mask during debris removal or gravel installation.
- Apply only rated fire-retardant sealants and follow label instructions.
- Avoid blocking deck vents or drainage paths to reduce heat buildup.
- Keep a water hose or extinguisher within 25 feet during sealant application or cleaning.
Troubleshooting
Inspect for trapped debris if smoke or heat appears under the deck. Clear dry material near joists and support posts. Improve drainage after gravel installation by replacing fine material with coarser stone.
Budget and Time
A standard 200 square foot deck zone requires 150 to 400 dollars. Gravel and sealant represent the primary expenses. Most projects take six to eight hours per day over a weekend. Professional installation of screening and flashing adds 200 to 300 dollars.
Maintenance
Sweep and rinse the gravel border every few weeks. Reseal deck boards every few seasons. Check mesh panels and fasteners after windy days.
Pro Tips for Success
Complete work in layers beginning with clearing, followed by sealing, then edging. Label storage bins for cushions and covers to allow rapid relocation during red flag warnings.
Protect Your Deck This Season
Measure a five foot buffer around the deck perimeter and mark the area. Clear the space, install gravel, and schedule paver installation for the following weekend. Each completed border adds another layer of defense to the property.