Introduction to Microclimate Mapping
Every yard contains distinct microclimate zones influenced by sunlight, wind, and moisture. These hidden variations determine how comfortable and functional an outdoor space like a deck will be. Before construction begins, mapping these zones ensures the design aligns with natural conditions, leading to lower maintenance and greater enjoyment.
Affordable apps and sensors make this process accessible to homeowners. By collecting precise data, individuals can avoid common pitfalls such as overly shaded or damp areas. This guide outlines the steps to map your yard effectively, interpret the results, and apply insights to deck planning.
Step 1: Select Tools and App
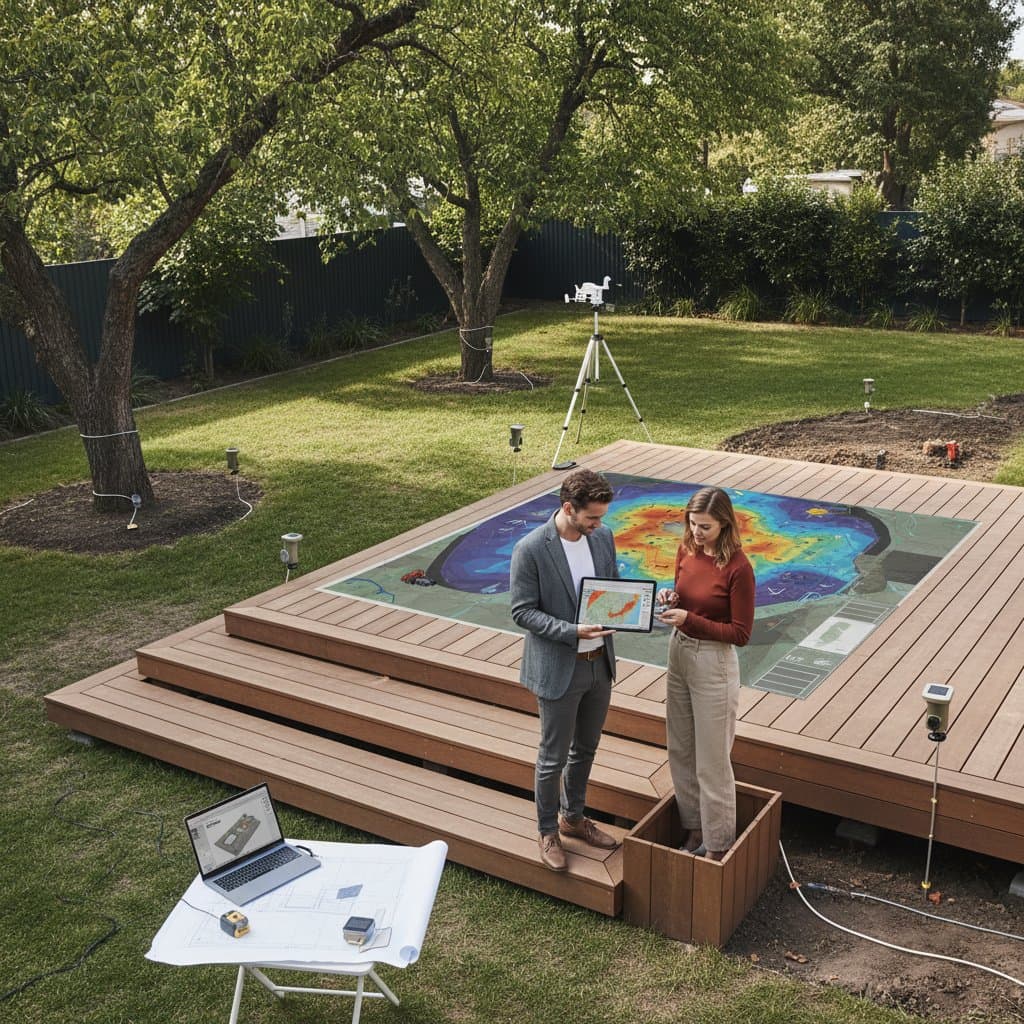
Begin by choosing a reliable microclimate mapping application. Popular options include those integrated with Bluetooth-enabled sensors for temperature, humidity, wind speed, and light intensity. Download the app from your device's store and review its compatibility with available sensors.
Acquire basic sensors if needed; starter kits often cost under fifty dollars and include mounting clips for fences or stakes. Ensure the app supports data visualization through heat maps or overlaid yard diagrams. Test the setup in a controlled indoor spot to familiarize yourself with the interface.
Step 2: Prepare Your Yard
Clear temporary obstacles like movable furniture or garden tools to expose true conditions. Identify key areas such as potential deck sites, noting fixed features like trees, walls, or slopes that affect airflow. Mark these spots with stakes or string for sensor placement.
Schedule mapping during representative weather, such as a clear day across multiple seasons if possible. Note the time of day, as morning fog or afternoon heat can skew initial readings. This preparation sets the foundation for accurate data collection.
Step 3: Place and Collect Data
Position sensors strategically across your yard. Place one in the proposed deck area, another in a shaded corner, and additional units near boundaries to capture variations. Secure them at varying heights: ground level for moisture, mid-height for wind, and elevated for sunlight.
Activate data logging through the app, allowing sensors to record over several hours or days. Walk the yard periodically to verify placements and note qualitative observations, such as breezy spots or warm patches. Sync the data at intervals to build a comprehensive profile.
Step 4: Analyze Patterns
Access the app's map view to examine collected data. Identify zones with consistent comfort metrics, including balanced temperatures between 68 and 82 degrees Fahrenheit, gentle airflow under 10 miles per hour, and moisture levels below 70 percent. Evaluate how these factors evolve from morning to afternoon, accounting for shifting sun positions.
Look for patterns like prolonged shade from structures or persistent dampness near downspouts. Use the app's color-coded overlays to pinpoint ideal locations. Cross-reference with seasonal averages if the app provides historical data for deeper insights.
Step 5: Apply the Findings
Integrate the analysis into your deck design. For instance, relocate the planned structure three to four feet to maximize sunlight exposure in cooler yards. Install overhead elements like pergolas in sun-intensive zones to mitigate afternoon overheating.
Address moisture issues by incorporating drainage solutions, such as French drains or sloped foundations, based on sensor readings. Select materials accordingly: opt for cedar in dry areas or composite decking in humid spots. These targeted adjustments can prolong usable outdoor time by weeks annually, enhancing overall value.
Troubleshooting Common Issues
Inconsistent readings may arise from improper sensor orientation. Ensure units sit level, away from direct sun glare, and unobstructed by vegetation or debris. Perform calibration via the app's settings menu to reset baselines.
Synchronization failures often stem from connectivity problems. Maintain a Bluetooth range under 30 feet during operation and avoid interference from thick walls. For mapping gaps, verify internet access, as some apps require it for full data rendering; manually refresh if connectivity drops.
Low wind measurements indicate ground-level placement errors. Elevate sensors to at least four feet to escape turbulence from grass or soil. Persistent issues warrant reaching out to the app's support for advanced diagnostics, often available through integrated chat features.
Smart Storage Strategies
Leverage microclimate data to optimize storage post-construction. Position cushion storage in low-humidity zones under 60 percent to prevent mold growth. Apply sealants to wooden surfaces during dry periods, ideally in spring or fall, for optimal penetration.
Select storage containers with ventilation features to circulate air in moisture-prone areas. Install an auxiliary sensor beneath the deck to track understructure conditions, alerting to airflow disruptions early. These practices align maintenance with environmental realities, minimizing wear and repair expenses.
Ongoing Maintenance Practices
Sustain monitoring after deck installation to observe material performance over time. Conduct seasonal reviews to detect shifts caused by weathering or landscaping changes.
Follow these maintenance steps:
- Wipe sensors clean monthly using a soft, dry cloth to remove dust accumulation.
- Swap batteries or recharge devices quarterly to ensure reliable operation.
- Relocate units as needed following additions like new plantings or barriers that alter patterns.
- Contrast current readings against baseline maps to identify emerging trends promptly.
Address anomalies such as increasing humidity by enhancing ventilation, introducing subtle fans, or trimming obstructing foliage. Proactive tweaks safeguard against degradation, preserving the deck's integrity for years.
Implement Your Plan
Understanding your yard's microclimate forms the cornerstone of a resilient deck. With the tools outlined, you possess the means to measure, analyze, and adapt effectively.
Initiate progress today by installing a mapping app and surveying your space for sensory cues like warmth gradients or draft paths. Dedicate weekly efforts to refining your approach: deploy sensors incrementally, draft layouts digitally, and simulate placements.
Superior decks emerge from informed choices, not mere aesthetics. Apply this knowledge to craft an outdoor haven tailored to your environment.