Introduction to Micro-Drip Irrigation for Balcony Plants
Balcony gardening offers urban dwellers a connection to nature, but travel disrupts regular care routines. A micro-drip irrigation system provides an automated solution that delivers precise water amounts directly to plant roots. This method conserves water, prevents overwatering, and ensures plants remain healthy during absences.
Such systems use low-pressure tubing and emitters to mimic natural rainfall. They suit small spaces like balconies and require minimal maintenance. Follow these steps to install one and gain confidence in leaving your plants unattended.
Step 1: Gather Materials
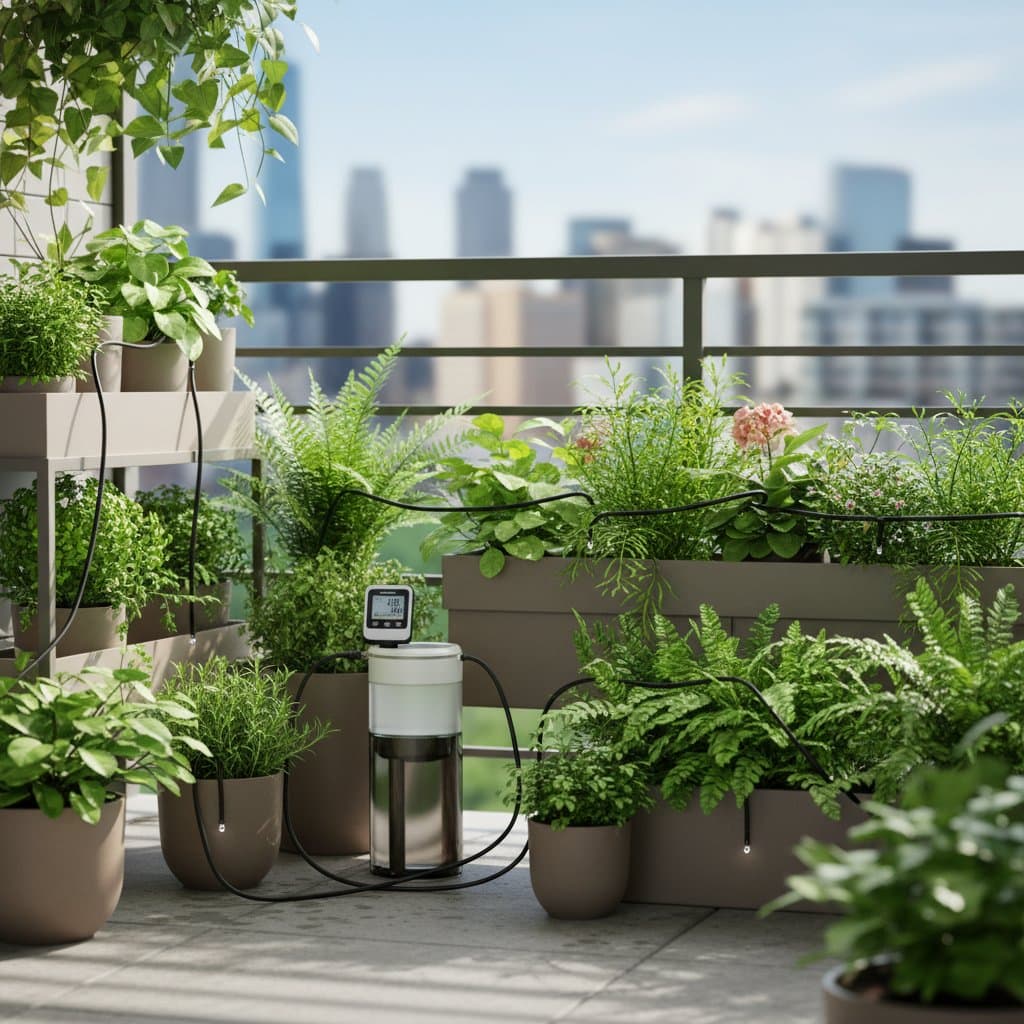
Select components suited for outdoor use. Essential items include 1/4-inch drip tubing, a pressure regulator, a filter, emitters rated at 0.5 to 1 gallon per hour, a punch tool, connectors, stakes, and a battery-operated timer.
Purchase from garden centers or online suppliers. For a basic setup serving four to six pots, acquire 20 feet of tubing, eight emitters, and one timer. Verify that all parts withstand UV exposure and temperature fluctuations.
Step 2: Plan the Layout
Map your balcony's configuration. Identify the water source, typically an outdoor faucet or indoor kitchen tap with an extension hose. Sketch paths for tubing to reach each planter without crossing walkways.
Measure distances between the source and plants. Account for elevation changes, as gravity influences flow. Position the timer near the faucet for easy access and protection from elements.
Step 3: Run the Main Line
Cut a length of tubing from the faucet to the first planter using sharp scissors for clean edges. Secure the tubing along rails or edges with UV-resistant clips spaced every 12 to 18 inches. Maintain a slight elevation to promote even water flow by gravity.
For extended systems, incorporate a T-connector to create branches toward additional planters. This design distributes water efficiently across multiple containers without pressure loss.
Step 4: Add Emitters
Use a punch tool to create holes in the tubing approximately 2 inches from each plant's base. Insert emitters firmly into the holes, ensuring a tight seal. Connect a 6-inch extension tube from each emitter to the soil surface and secure it with a plastic stake near the plant stem.
Small pots require one emitter centered over the root zone. Larger containers benefit from two emitters placed 4 to 6 inches apart to cover the entire area uniformly.
Step 5: Set the Timer
Attach the timer to the faucet after the pressure regulator and filter. Program it for brief, frequent watering sessions, such as 10 to 15 minutes daily during warm weather. Monitor soil moisture for the first few days and adjust intervals accordingly.
Battery-operated timers suffice for most setups. Advanced wireless models allow remote monitoring via smartphone applications, providing updates on watering status during trips.
Step 6: Test and Adjust
Activate the system to purge air from lines and inspect for leaks at connections. Observe emitters for consistent, slow drips without spraying or irregular flow. Address any issues by cleaning affected parts or replacing faulty components.
Following the initial test, verify that soil reaches an evenly damp state without saturation. Fine-tune timer duration or emitter rates based on plant response and environmental conditions.
Safety Considerations
Position electrical timers in dry, shaded locations to avoid moisture damage. Install a pressure regulator on systems linked to indoor faucets to maintain safe operating levels below 25 PSI.
Secure all tubing along walls or railings to eliminate tripping risks. Perform monthly filter cleaning to avoid clogs that could lead to system failure.
For balconies without direct faucet access, employ a gravity-fed reservoir elevated at least 3 feet above planters. Attach tubing to the reservoir's bottom outlet, relying on hydrostatic pressure for distribution.
Troubleshooting Common Issues
Uneven watering or dry pots: Inspect emitters for clogs or tubing for kinks. Flush the entire line with clean water to restore flow.
Leaks at connectors: Trim tubing ends squarely and reinsert fittings securely. Refrain from excessive force during assembly.
Water puddling under one plant: Install a lower-flow emitter or reduce session length to match soil absorption rates.
Low pressure affecting all emitters signals a dirty filter or regulator. Disassemble and rinse these components thoroughly to reestablish normal operation.
Maintenance and Storage Practices
Conduct inspections of connections every few weeks to detect wear. Replace tubing segments cracked from prolonged sun exposure. Soak emitters in a vinegar-water solution to remove mineral deposits and restore functionality.
Ahead of freezing weather, drain all water from the system completely. Coil tubing carefully, cap endpoints, and store in a dry container. Keep timers and filters indoors to prolong their lifespan.
Rinse reservoirs before seasonal refills to eliminate algae growth and maintain water quality.
Cost and Time Investment
A fundamental balcony micro-drip system ranges from 45 to 90 dollars, varying with timer features and pot quantity. First-time installation typically requires 1 to 2 hours.
Annual expenses remain low, often limited to 10 dollars for emitter replacements or batteries. Water conservation and reduced plant losses recoup initial costs quickly.
Seasonal Adjustments
In warm months, extend watering duration if plants exhibit midday wilting. During cooler periods, shorten cycles to avoid excess moisture retention.
Prior to departure, test for leaks, replace timer batteries, and ensure faucet valves remain open. Upon return, assess for overwatering signs and recalibrate as necessary.
A pre-trip verification run instills confidence. Plants greet you upon arrival in robust condition, free from neglect.
Professional Assistance Options
For indoor water sources shared with appliances, consult a licensed plumber to install an exterior faucet or backflow preventer. Professionals guarantee compliance with building codes and safe pressure management.
Manage layout, tubing routing, and emitter placement independently. Request detailed estimates and confirm that installed parts suit outdoor conditions.
Implementing Your System
Begin with select planters to test the setup. Observe improvements in plant vitality within a week.
Gradually extend coverage to additional balcony areas or indoor setups near windows. Record optimal run times and soil reactions to refine schedules for different plant varieties.
This automation liberates schedules for travel without compromising greenery. Plants receive consistent hydration, yielding vibrant results effortlessly.