Rooftop Meadows: Enhancing Urban Biodiversity with Native Plants
City rooftops often stand as barren, heat-trapping expanses. These spaces hold potential to become vibrant habitats that support pollinators, lower temperatures, and offer serene vistas. A native rooftop meadow consists of a soil layer combined with locally adapted plants, transforming unused roof areas into productive ecosystems.
This guide provides essential knowledge on the mechanics of rooftop meadows, their requirements, and safe, cost-effective installation methods. Readers will discover the necessary tools and materials, layering techniques for drainage and soil stability, climate-appropriate plant selections, and strategies for year-round maintenance.
Overview
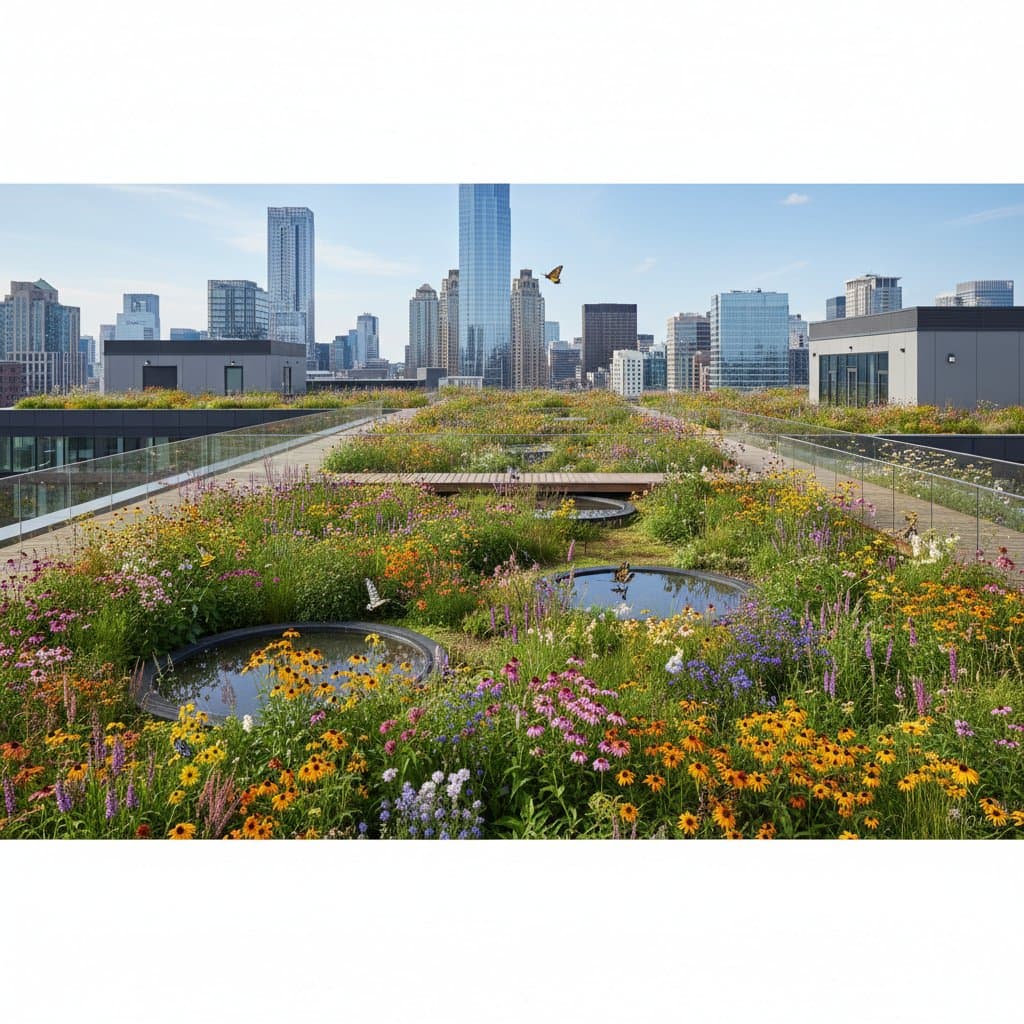
A rooftop meadow qualifies as a green roof system featuring low-profile native plants suited to minimal soil depths. In contrast to ornamental rooftop gardens, these meadows replicate natural ecosystems. They sustain bees, butterflies, and birds, while minimizing stormwater runoff and mitigating roof temperatures.
Native plants prove essential due to their adaptation to regional pollinators and climatic conditions. Established specimens require reduced irrigation, exhibit natural pest resistance, and provide nourishment for wildlife in ways that non-native ornamentals fail to achieve. One such meadow can accommodate dozens of native species and attract hundreds of pollinators during peak seasons.
Key advantages encompass:
- Reduced building temperatures through shading and heat absorption
- Diminished stormwater runoff via soil retention and plant transpiration
- Enhanced biodiversity supported by native flora such as flowering perennials and grasses
- Improved air quality from particulate filtration and oxygen production
- Elevated personal well-being through proximity to vegetation and noise attenuation
Individuals with access to flat or low-slope roofs can contribute to this urban greening initiative.
Tools and Materials
Prior to commencement, verify the roof's capacity to accommodate added weight. Engage a licensed structural engineer to confirm support for at least 20 to 40 pounds per square foot in a lightweight green roof assembly. This evaluation remains non-negotiable.
Essential items include:
- Root barrier membrane to safeguard the underlying roof
- Drainage layer, such as lightweight aggregate or modular plastic boards
- Filter fabric to prevent soil intrusion into drainage systems
- Growing medium, comprising mineral and organic components at 4 to 6 inches in depth
- Native plant plugs or seed mixtures, incorporating 20 to 30 species for ecological variety
- Manual implements like trowels, rakes, and watering devices
- Protective gear including gloves, slip-resistant footwear, and edge safety barriers or harnesses
Each component fulfills a distinct purpose. The barrier averts root penetration, the drainage layer avoids waterlogging, and the growing medium secures plants while retaining hydration.
Installation Steps
Step 1: Evaluate and Prepare the Roof
Remove accumulated debris and inspect for fissures or vulnerabilities. Thoroughly clean the surface to ensure membrane adhesion. Address all repairs prior to introducing additional load. Accommodate existing vents and drains within the design to maintain accessibility.
Step 2: Apply the Root Barrier
Position the membrane in overlapping panels. Secure joints with waterproof sealant. This protective sheath shields the roof from invasive root growth. Extend edges upward by at least 8 inches along parapets to retain subsequent soil additions.
Step 3: Incorporate Drainage and Filter Layers
Distribute a 1- to 2-inch layer of lightweight gravel or drainage mats. Overlay with filter fabric. This material permits water passage while blocking soil migration into drainage pathways.
Step 4: Introduce the Growing Medium
Distribute the soil mixture via pouring or shoveling. Level the surface with a rake, avoiding compaction. Optimal formulations blend expanded clay, compost, and coarse sand. Target 4 to 6 inches of depth to accommodate meadow vegetation; greater thicknesses enable taller growth but increase structural demands.
Step 5: Integrate Native Plants
Select indigenous species resilient to full sun, wind exposure, and periodic drought. Suitable choices feature:
- Little bluestem and switchgrass for architectural form
- Black-eyed Susan, purple coneflower, and wild bergamot for vibrant blooms and pollinator appeal
- Butterfly milkweed and coreopsis for extended flowering durations
- Sedges and asters for autumnal coverage
Position plugs in groupings spaced 12 inches apart, or evenly scatter seeds and lightly press them into the medium. Irrigate copiously immediately following placement.
Step 6: Apply Initial Mulch
Cover the surface with a modest layer of straw or finely shredded bark. This application curbs erosion and conserves moisture, aiding seedling root development amid initial heat.
Step 7: Irrigate and Observe
Provide water every few days during the initial month, transitioning to weekly applications until establishment occurs. Mature rooftop meadows demand infrequent watering as roots extend. Monitor for wind-induced damage or sparse areas, reseeding as necessary.
Safety Considerations
Secure a harness or install guardrails whenever nearing roof perimeters. Position hoses and equipment clear of primary walkways to minimize slip hazards. Refrain from activities during gusty conditions or precipitation, as damp surfaces heighten risks. Adhere strictly to approved loading capacities, avoiding excess soil or water storage.
These precautions sustain the project's viability for personal and structural integrity.
Common Challenges and Solutions
Standing Water or Inadequate Drainage
Verify filter fabric integrity and drain patency. Examine the drainage layer by elevating a peripheral section. Introduce additional gradient or auxiliary channels if persistent issues arise.
Uneven Vegetation Coverage
Inconsistent light or soil variability often underlies sparse growth. Supplement shallow zones with medium, reseed affected areas, and apply targeted irrigation until uniformity develops.
Invasive Weeds from Aerial Dispersal
Extract weeds manually prior to seed set. As native plants mature, they outcompete intruders by occupying available space.
Signs of Water Deficit or Foliar Wilting
Probe soil moisture at a 2-inch depth. Deliver deep watering in the morning if arid; replenish mulch to shield exposed roots.
Ongoing Care
Rooftop meadows achieve self-sufficiency post-initial season. Routine interventions preserve vitality.
- Conduct weeding one to two times annually to eliminate non-natives.
- Prune spent stems in late winter, promoting fresh emergence.
- Examine drainage features quarterly for obstructions.
- Apply a half-inch compost layer yearly to replenish soil fertility.
Store surplus medium, seeds, and implements in airtight vessels protected from dampness. House gloves, trowels, and irrigation tools indoors during idle periods.
Cost and Timeline Estimates
Expenses fluctuate with roof dimensions and site logistics. For a 200-square-foot installation, anticipate $800 to $1,500 in materials and vegetation costs for self-directed efforts. Professional services for sealing or planting may elevate totals accordingly.
Allocate two weekends for primary assembly and early tending, followed by monthly light duties. Benefits accrue over time, including diminished energy expenditures, extended roof longevity, and contributions to metropolitan ecology.
Seasonal Guidelines
Spring: Survey for cold-weather harm, unclog drains, and amend bare patches with seeds. Irrigate as growth initiates.
Summer: Supplement water amid prolonged dry spells. Native beneficial insects typically manage minor infestations like aphids.
Fall: Retain seed structures to nourish avifauna and facilitate propagation. Clear substantial litter or limbs only.
Winter: Permit snow accumulation for natural insulation. Minimize foot traffic on iced foliage. Post-melt, assess for barrier breaches or water accumulation.
Adhering to these rhythms fosters perennial equilibrium.
Professional Assistance Indicators
Manage planting, hydration, and routine upkeep independently. Summon experts for ongoing leaks, roof deflection, or load-related concerns. Certified roofers or green infrastructure specialists offer secure diagnostics and remedies.
Secure permissions and engineering assessments for communal or rental properties. Professionals assist with irrigation designs for expansive or inclined surfaces.
When selecting service providers, inquire about:
- Anticipated load-bearing capacity of the assembly.
- Root protection strategies for waterproofing.
- Tailored maintenance protocols for native meadow systems.
Precise responses safeguard structural and financial interests.
Essential Insights
- Native flora in rooftop meadows fosters habitats and tempers thermal loads.
- Layered components for root containment, drainage, and nourishment ensure operational safety.
- Species such as bluestem, coneflower, and milkweed excel in limited soils while drawing pollinators.
- Meticulous setup curtails leakage, erosion, and upkeep demands.
- Incremental beginnings cultivate expertise for subsequent expansions.
Each meadow expands vital greenery in dense environments. Modest areas suffice to shelter pollinators, sequester precipitation, and moderate ambient heat.
Next Actions
Initiate progress with these immediate measures:
- Evaluate roof accessibility and integrity; consult an engineer regarding 20 pounds per square foot minimum.
- Investigate regionally suited native seed blends via extension services or nurseries, emphasizing rooftop tolerances.
- Establish a trial 4-by-4-foot section to gauge drainage and plant resilience to exposure.
Scale efforts as proficiency increases. Engage community members to collaborate, exchange resources, and document biodiversity gains. Collective endeavors weave rooftops into interconnected urban oases, each patch vitalizing the airspace and sustaining essential ecological processes.