
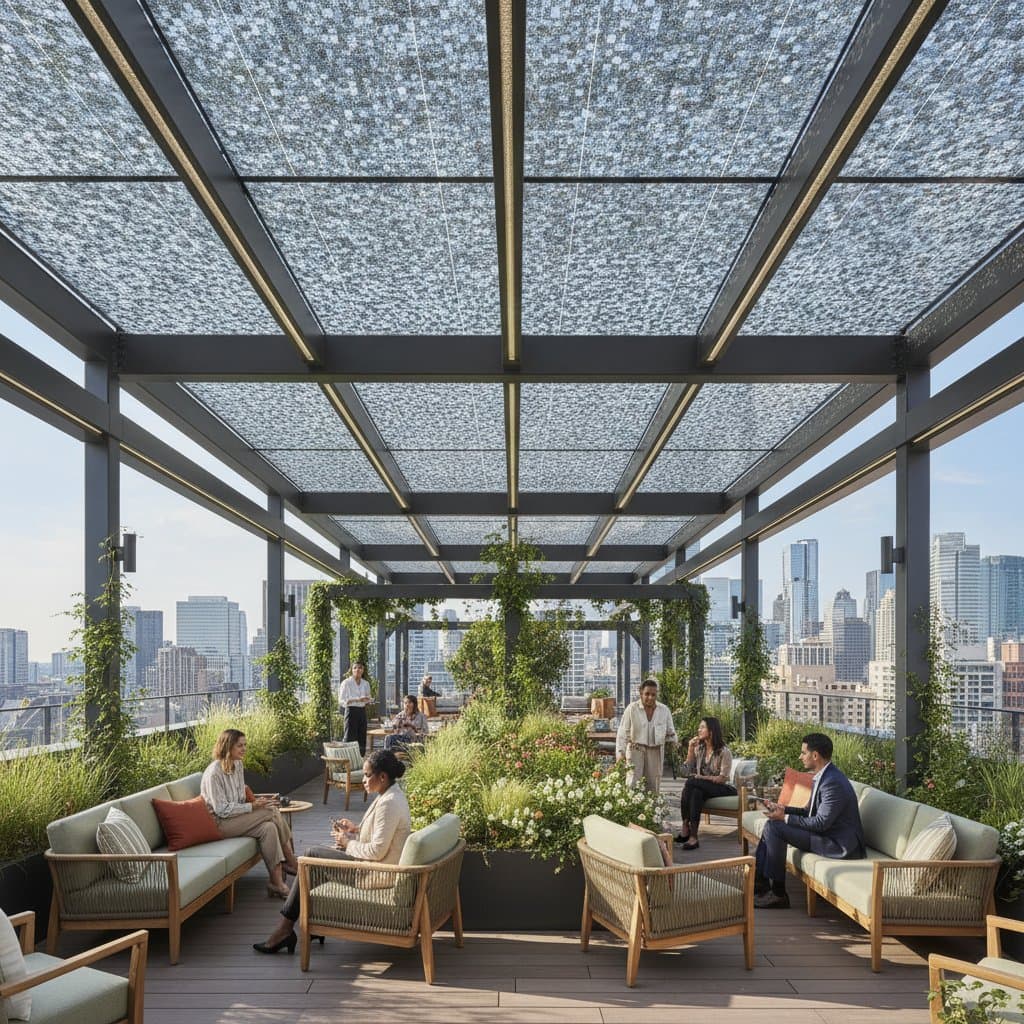
Solar Canopies Turn Rooftops Into Green Power Oases
A bare rooftop can feel like wasted space, especially in a dense city where every square foot matters. A solar canopy changes that surface into a shaded, planted place that also produces electricity.
This guide explains how rooftop solar canopies work, where transparent solar panels fit, and how you can plan a safe, useful green power oasis. You will review the benefits, check your roof, choose plants, compare costs, and set up a practical maintenance routine.
Overview
A solar canopy is a raised structure that supports solar panels above a roof, terrace, parking area, or outdoor gathering space. The open space below can provide shade, seating, garden beds, rain protection, or equipment storage.
A green power oasis combines three elements:
- Solar panels that generate electricity.
- Plants and soil that cool and soften the roof.
- Usable space for people, pollinators, or building equipment.
Transparent solar panels allow some daylight to pass through while producing power. They can work well above seating areas, walkways, and shade tolerant plants. Their output depends on panel design, roof direction, shading, cleanliness, and local conditions.
The main benefit is efficient use of space. A canopy can lower roof surface heat, protect people from strong sun, and generate power without covering every open area with solid panels.
What to Check Before Planning
Start with the roof, not the panels. A canopy adds weight from steel or aluminum framing, panels, wiring, planting containers, soil, water, and people. A structural engineer should review the roof before installation.
Inspect these conditions:
- Roof age and waterproofing condition.
- Drain locations and clear paths for water.
- Parapet height and safe access points.
- Existing mechanical equipment and vents.
- Wind exposure and possible uplift.
- Available electrical service and panel capacity.
- Areas that receive at least four to six hours of useful sunlight.
Ask for a roof plan that shows clear walking paths. Keep at least 3 feet around key service areas when local rules and equipment needs require it. Never block a drain, emergency route, vent, or access hatch.
Tools and Materials
A professional installation needs licensed electrical and structural support. For planning and early setup, gather:
- A tape measure, 25 feet.
- A compass or phone based sun tracking tool.
- Roof photos and a simple sketch.
- A moisture meter for checking planter soil.
- Lightweight containers, two to six per seating zone.
- Native or climate suited plants.
- Drip irrigation tubing and a filter.
- A timer or smart irrigation controller.
- Reflective pavers for walking paths.
- Cable labels and weather resistant storage bins.
Choose lightweight growing media made for rooftops. Standard garden soil holds too much water and can add excessive weight. A roof planting professional can specify the saturated weight, which includes water after heavy rain.
Steps
1. Map Sun, Shade, and Use
Measure the roof and mark sunny, partly shaded, and fully shaded zones. Record where people want seating, where plants can grow, and where maintenance equipment must remain accessible.
Place the canopy over the space that needs shade most. A dining table, bench, or community garden work area often benefits more than a rarely used roof corner.
2. Confirm Structure and Drainage
Hire a structural engineer to review the canopy attachment method and total load. Ask for a written capacity recommendation in pounds per square foot, or kilograms per square meter.
Protect the waterproof membrane with approved pads or attachment details. Do not drill through the roof surface without a designed flashing system. Water leaks can cost far more to repair than careful planning.
3. Choose the Canopy Frame
Aluminum resists corrosion and keeps weight low. Galvanized steel can provide greater strength, though it needs proper coating and connection details.
Set the lowest canopy edge high enough for comfortable movement. A clearance near 8 feet often works for walking areas, though local building rules control the final height. Include gutters or collection edges if the canopy will direct rainwater.
4. Select Solar Panels
Use opaque panels where maximum power matters most. Use transparent or semi transparent panels above seating, skylight like areas, and shade tolerant plants.
Ask installers for the expected annual energy production, panel efficiency, inverter location, warranty terms, and maintenance access. Transparent panels may produce less power per square foot than opaque modules, yet they can provide a better balance between daylight and shade.
5. Add Plants and Comfort Features
Use shallow rooted plants in containers or engineered roof beds. Good choices may include sedum, ornamental grasses, herbs, compact shrubs, and native flowering plants suited to wind and heat.
Keep plants below the panel edge unless a designer confirms that growth will not shade the modules. Add benches, light colored pavers, and a small storage box for hoses and tools. Keep combustible materials away from electrical equipment.
6. Connect Power Safely
A licensed electrician should install conduits, disconnects, inverters, grounding, and the connection to the building electrical system. Cables must stay protected from standing water, sharp edges, heat, and foot traffic.
Label each disconnect and keep a simple diagram in a weather resistant cabinet. Never handle exposed wiring or attempt to connect a panel system yourself.
Safety Tips
Strong wind can lift poorly anchored canopies. Use an engineer approved anchoring system and inspect bolts after severe weather.
Keep a clear path to drains, doors, fire equipment, and roof access points. Do not store loose pots, umbrellas, or furniture beneath the canopy where wind can move them.
Use non slip walking surfaces, guardrails where required, and lighting that does not create glare for nearby apartments or drivers. A licensed professional should confirm electrical grounding and code compliance before the system operates.
Troubleshooting
Panels produce less power. Check for new shade from plants, dirt, nearby construction, or a disconnected inverter. Clean panels with soft water and a non abrasive brush when the manufacturer permits it.
The roof feels damp. Inspect planter trays, irrigation lines, and drainage outlets. Pause watering until a roofer checks the membrane and finds the source.
Plants wilt under transparent panels. Confirm container drainage and soil moisture. Move sun sensitive plants to deeper shade, and select species suited to rooftop wind.
Water collects near the canopy. Clear leaves from gutters and drains. If pooling returns, ask a roofer to inspect the roof slope and drainage design.
Budget and Time
A small canopy over a seating area can cost roughly $8,000 to $20,000, including framing, panels, electrical work, and basic installation. A larger rooftop system with structural upgrades, irrigation, planting, and design support can reach $30,000 to $75,000 or more.
Reserve 10 to 20 percent for repairs, permits, engineering changes, and electrical upgrades. Do not cut costs on structural review, waterproofing, grounding, or wind resistance. Save money with modular planters, simple benches, and phased planting.
Planning often takes several weeks, while fabrication and installation may require several more. Ask each contractor for a written scope, payment schedule, insurance proof, and maintenance plan.
Maintenance
Inspect the canopy each month. Look for loose fasteners, rust, damaged seals, blocked drains, cracked planters, and exposed cables.
Planning Your First Installation
Begin by contacting a structural engineer familiar with rooftop loads and a solar installer who has completed similar projects. Request site visits from both professionals before committing to any design. Document existing conditions with dated photos and measurements. Schedule a follow up meeting to review preliminary drawings and cost estimates. This sequence keeps the project on track and prevents costly changes later.