Planning Your Solar Pergola
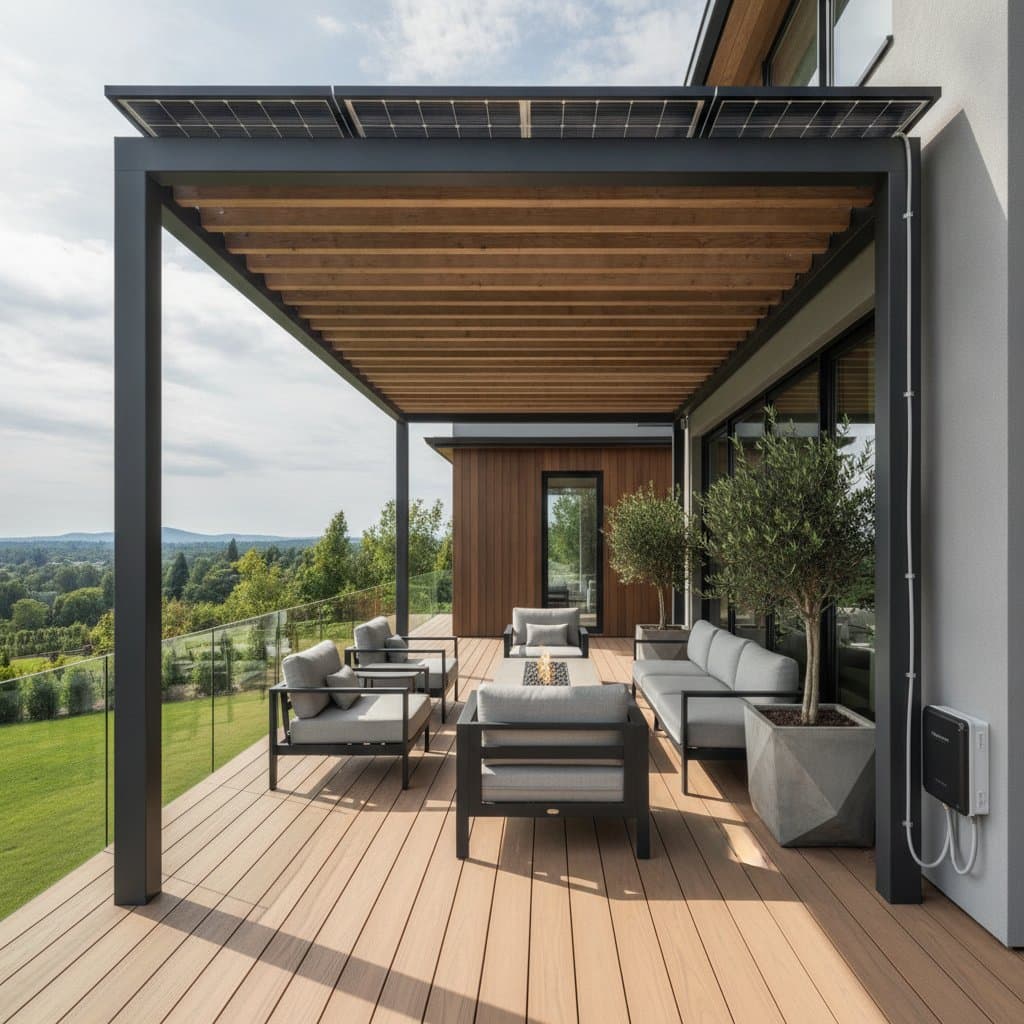
A solar pergola combines structural shade with photovoltaic panels to generate electricity while protecting your deck from sun exposure. Proper planning begins with assessing available sunlight. Track shadow patterns across the deck for at least one full day to identify the optimal panel orientation.
Select pressure treated lumber or cedar for the frame to resist outdoor conditions. Determine panel quantity based on your target energy output and local sunlight hours. Obtain necessary permits before construction begins.
Building the Frame
Set concrete footings at each corner to support the posts. Attach beams and rafters with galvanized hardware rated for structural loads. Space rafters to accommodate panel dimensions without excessive overhang.
Position the frame to face south in the northern hemisphere for maximum solar gain. Verify all joints remain square and level throughout assembly. This foundation supports both the shade function and the weight of the panels.
5. Connect the Electrical System
Run wires through conduit to the inverter. If you plan to tie the system into household circuits, a licensed electrician must handle that step. The inverter can mount on an exterior wall or inside a weatherproof box near the deck.
6. Test and Seal
Once connected, test voltage output with a circuit tester. Seal all wire penetrations with silicone caulk to prevent water leaks. Apply a weatherproof finish to wood surfaces.
7. Add Accessories
Install LED strip lights, outdoor outlets, or a ceiling fan rated for damp areas. These small upgrades make the shaded area more functional.
Safety Tips
- Do not attempt roof work on windy or wet days. Panels are slippery when damp.
- Keep wiring runs short to reduce voltage drop.
- Label all electrical boxes for clear identification.
- Use outdoor rated cables and connectors only.
- Clean panels from the ground with a hose or extendable brush, never by climbing on top.
A certified electrician or solar installer can guide you through final connections if you are uncertain. The structure itself is simple carpentry. The electrical side needs precision.
Troubleshooting
Even well built systems can face small issues. Here are common ones and how to fix them.
Low Power Output
- Possible Cause: Shading from trees or debris on panels.
- Fix: Trim nearby branches and clean the surface monthly with mild soap and water.
Inverter Not Turning On
- Possible Cause: Tripped breaker or loose connection.
- Fix: Reset breaker, then inspect wiring. If problem continues, call a technician.
Uneven Shade or Panel Alignment
- Possible Cause: Rafters not level or inconsistent spacing.
- Fix: Adjust brackets and recheck alignment using a level.
Water Leaks at Wire Entry Points
- Possible Cause: Incomplete sealant coverage.
- Fix: Add more silicone or use rubber grommets.
Small checks each season keep major repairs away. Always power off the inverter before touching wires or panels.
Budget and Time
Average homeowners spend between 4000 and 10000 dollars for a midsize energy generating pergola. The range depends on materials, number of panels, and whether you build it yourself or hire a contractor.
- Structure only: around 1500 to 3000 dollars
- Solar components: 2000 to 6000 dollars
- Professional installation: 1000 to 2500 dollars
You can save roughly 20 percent by assembling the wood frame yourself. Plan for two weekends if building solo. A crew of two can finish faster. Always schedule an inspection if your system connects to the home grid.
Maintenance
Keep your pergola working well with a few simple habits.
Monthly
- Rinse panels with water to clear dust.
- Check bolts and brackets for loosening from wind movement.
- Sweep leaves from rafters.
Seasonally
- Inspect wiring insulation for wear.
- Reapply a UV resistant wood sealant every year or two for longer life.
- Test inverter display for consistent power output.
Batteries, if used, last about five to eight years. Replace them through your installer when capacity drops below 70 percent.
Smart Storage Moves
A solar pergola often inspires a tidy deck. Use the shaded space below for organized storage.
- Add waterproof deck boxes for cushions and tools.
- Mount hooks inside posts for hanging lights or garden gear.
- Keep cords coiled and labeled in a small bin.
- Install a narrow shelf near the inverter to hold manuals and cleaning supplies.
Keeping everything in one spot makes maintenance faster and safer.
When to Call a Pro
Call a professional if:
- You see cracked panels or damaged glass.
- The inverter shows fault codes you cannot clear.
- Voltage readings drop by more than 15 percent after cleaning.
- You plan to connect the pergola system into your home main breaker panel.
Making It Happen
You can start small. Begin with a pergola that shades your dining area, then add solar panels later. Or invest in a full energy generating version from the start.
Three steps you can take today:
- Measure your sunlight hours. Watch where shadows fall during the day to find the best spot for panels.
- Set a clear budget. Decide what portion covers structure versus energy equipment.
- Consult local codes for grid connection requirements.
Enjoying Year Round Benefits
An energy generating pergola reduces reliance on grid power while creating a comfortable outdoor living area. Consistent care ensures reliable performance across seasons.