AI Sensors Create Effortless Self-Watering Balconies
Balcony gardens require consistent care, yet time constraints and variable weather often complicate watering routines. An AI-powered self-watering system eliminates daily guesswork. Setup occurs once, after which plants receive precise moisture levels automatically.
This guide covers the function of AI sensors in balcony irrigation, necessary tools, safe installation procedures, and ongoing maintenance practices.
Overview
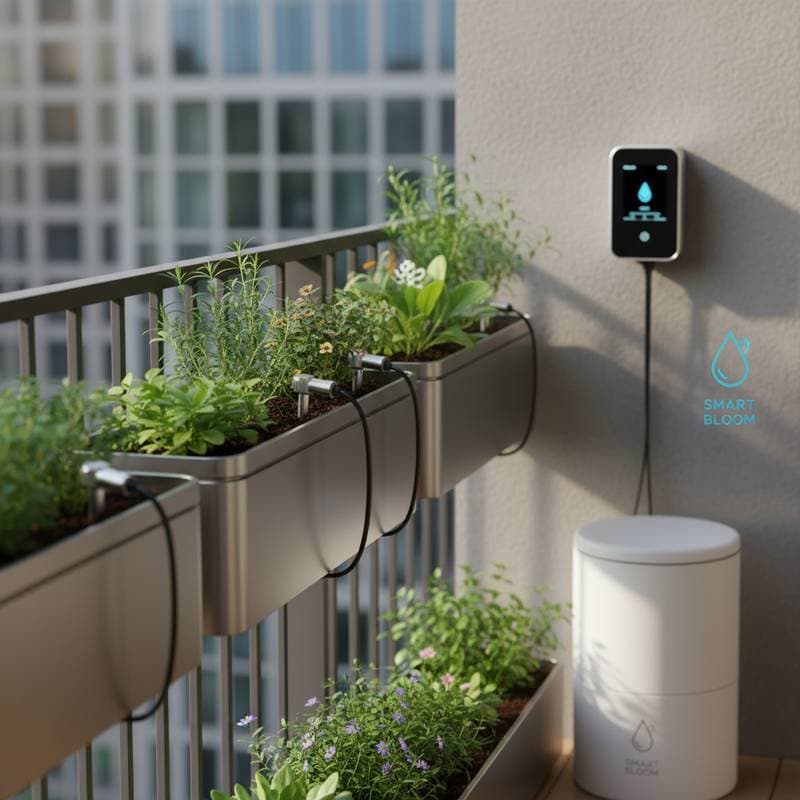
An AI self-watering system incorporates soil moisture sensors, a smart controller, and irrigation lines. Sensors measure soil conditions and transmit data to the controller for real-time adjustments. Users monitor and modify settings through a mobile application.
Consistency represents the primary advantage. Plants maintain steady hydration, which supports root health and minimizes water waste. Such systems reduce balcony water consumption by up to 40 percent relative to manual methods. They also sustain plant vitality during travel or missed watering sessions.
Tools and Materials
Construction of a basic AI watering setup requires several components. Most commercial kits supply essential items.
You will need:
- One AI irrigation controller equipped with Wi-Fi capability
- Two to four soil moisture sensors, allocated one per planter group
- One submersible pump or a connection to a balcony faucet
- One roll of one-quarter-inch drip tubing
- Ten to twenty drip emitters or micro-sprayers
- An outdoor-rated power source or solar panel
- Mounting clips and waterproof connectors
Assemble these materials in advance. Confirm that sensors suit outdoor humidity conditions and that the controller application supports your mobile operating system.
Steps
Step 1: Plan your layout
Sketch the balcony space. Identify each planter and record the associated plant varieties. Group plants according to similar water requirements. This organization enables the AI controller to develop precise watering patterns.
Step 2: Place sensors in soil
Insert sensors approximately two inches deep near root zones. Position them away from direct drip lines. Secure sensor wires with clips to maintain safety and organization.
Step 3: Connect tubing and emitters
Route tubing along balcony edges. Use a hole punch to attach emitters adjacent to individual plants. Maintain neat line arrangements to prevent tangles.
Step 4: Attach pump or faucet
Link the main tubing line to the water source. For pump installations, enclose the unit in a water-safe container and connect it to a GFCI outlet. Inspect all connections for leaks prior to activation.
Step 5: Sync controller and calibrate
Install the companion application. Pair the controller with sensors and define soil moisture targets. Typical settings range from 25 to 40 percent for common balcony plants. Execute a brief test cycle to verify even distribution from each emitter.
Step 6: Observe and adjust
Allow the system several days to learn environmental patterns. It will generate a schedule informed by weather data and soil readings. Modify thresholds as needed based on plant appearance.
Safety Tips
Use only outdoor-rated extension cords and waterproof connections. Position electrical components above floor level to avoid moisture exposure. Avoid routing tubing across walkways to prevent hazards.
Troubleshooting
Wilted plants often indicate low sensor batteries. Replace or recharge them promptly. Surface water pooling suggests a need to reduce the moisture target by five percent. Connection losses in the application require Wi-Fi module resets and signal verification.
Maintenance and Storage
Clean sensor probes with a damp cloth every two weeks. Flush tubing monthly with clean water to clear mineral deposits. At season end, drain lines, coil tubing, and store sensors indoors in a dry location away from sunlight.
Budget and Time
Starter kits range from 120 to 250 dollars. Installation requires one to two hours. Individual replacement sensors cost 15 to 30 dollars.
When to Call a Pro
Engage a licensed electrician for outdoor outlet installation or hardwiring needs. Inquire about appropriate weatherproof covers and GFCI safeguards.
Next Actions
Measure balcony planters and document plant-specific requirements. Purchase a compact outdoor-rated AI irrigation kit. Complete setup during a weekend and verify initial moisture readings.
A self-watering balcony delivers reduced maintenance tasks, improved plant health, and decreased water expenses through this single intelligent addition.