Micro-Drip Systems Make Small Garden Watering Effortless
Your balcony garden thrives only when watering remains steady and precise. Daily hand watering feels peaceful for a week, then becomes a chore. Miss two days and pots dry out. Overwater once and roots suffer. A micro-drip irrigation system replaces that guesswork with quiet, measured control. It delivers water right to the soil surface in small, steady drops.
The goal is simple. Consistent moisture with minimal waste follows from proper planning. You will learn how a micro-drip system works, what to buy, how to assemble it, and how to keep it running through each season.
Tools and Materials
Start with a small kit, then expand later if needed. Most parts are reusable and compatible across brands. For one compact balcony or patio, gather the following items.
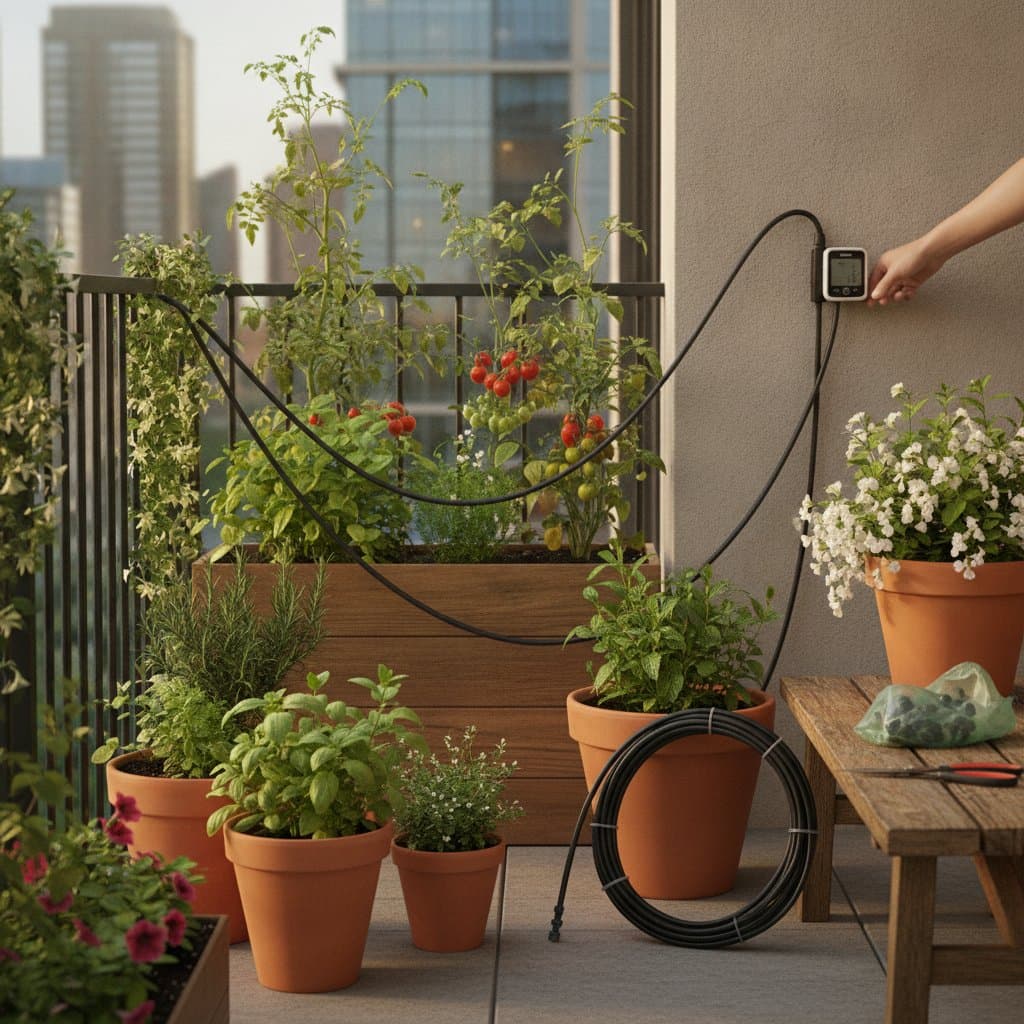
- Main supply tubing: 25 to 50 feet of 1/2-inch (12 mm) tubing
- Micro tubing: 25 feet of 1/4-inch (6 mm) tubing
- Drip emitters: 10 to 20 pieces rated 1 gallon per hour or less
- Connectors: Tees, elbows, and couplers for corners and joins
- End plugs: 2 to close the main line
- Pressure regulator: 1 rated for 25 PSI
- Filter: 1 inline model to keep debris from clogging emitters
- Timer: 1 battery or solar-powered model for automation
- Stakes or clips: 10 to 15 to anchor tubing in soil or pots
- Hole punch: 1 to insert emitters cleanly
- Scissors or utility knife: for cutting tubing
Optional but useful additions include a backflow preventer to protect household water lines, soaker line segments for planter boxes, and tubing stakes with built-in emitters for uniform container spacing. Most small setups cost between 45 and 90 dollars. Smart timers add about 25 to 60 dollars depending on features.
Safety Tips
Always use a pressure regulator. Without it, tubing can burst or emitters can pop out. Keep tubing away from hot surfaces or sharp edges. Heat can soften plastic and cause leaks. Do not mix brands unless labeled compatible. Some fittings vary slightly in diameter. Turn off the system before adjusting emitters or cutting tubing to avoid injury or water spray. Check for signs of mold or algae around emitters. Clean with mild vinegar if buildup appears.
Budget and Time
Expect a small balcony setup to take 2 to 3 hours from start to finish, including testing. Larger patio systems may need 4 to 6 hours if you include multiple zones. Approximate costs break down as follows. A starter kit runs 45 to 90 dollars. A smart timer costs 25 to 60 dollars. Extra tubing and fittings add 10 to 25 dollars. The largest cost driver is automation. Manual valves are cheaper but require more attention. Smart timers pay off by preventing overwatering and reducing water bills.
Seasonal Reminders
Spring
Inspect stored tubing for cracks. Replace any stiff or brittle sections. Reinstall the filter and pressure regulator. Test each emitter before planting new crops.
Summer
Increase watering duration slightly as heat rises. Clean algae growth from emitters using a vinegar rinse. Adjust timer schedules once daylight hours lengthen.
Autumn
Reduce watering frequency as temperatures cool. Flush lines to remove sediment. Store portable components if frost is expected.
Winter
Drain water from the entire system if not in use. Keep tubing inside or cover exposed parts. Check smart timers for proper battery storage.
When to Call a Pro
Call a professional or irrigation technician if you plan to run more than two watering zones. Your water source pressure varies often. The balcony faucet is not accessible or leaks persist. You want integration with a full smart home system. Ask the pro to test water pressure, size the tubing correctly, and check for proper backflow prevention. A brief service call often costs less than replacing damaged hardware later.
Smart Upgrades
If you already have a micro-drip layout, consider expanding its intelligence. Small Wi-Fi timers let you adjust watering from your phone. Some models read local weather data and skip watering on rainy days. Add soil moisture sensors near larger planters. They measure how damp the soil is, then signal the timer to delay watering if moisture is high. This can save roughly 20 percent of total water use each month. Solar-powered timers reduce battery changes and run quietly without extra wiring. These upgrades are optional but make balcony gardens nearly self-sufficient.
Pro Tips for Success
Keep tubing runs short and direct. Long loops reduce pressure and slow flow. Test new emitters in a bucket before installation to confirm flow rate. Mark valve positions with waterproof tape so you always reopen them correctly after maintenance. Place timers and electronics under a small overhang to avoid rain exposure. Use dark tubing to discourage algae growth. Record your layout. A simple sketch saves time when adding new pots later.
Next Steps
A micro-drip system turns watering from a daily task into a gentle routine of inspection and care. Once installed, you only adjust timing and check for clogs. Start today by measuring your growing area and noting how many pots you have. Buy one basic kit and a timer that fits your space. Tomorrow, enjoy your coffee while your garden waters itself. Adjust once a week, clean once a month, and let the system handle the rest.